
The PHP Editor lets you add server-side PHP logic to your custom widgets in the WDesignKit Widget Builder. Use it to pull live data from your site (posts, products, users, custom fields), call external APIs, and output dynamic content that plain HTML cannot handle.
Available for: Elementor and Bricks
Plan: Free for all users
Not available for: Gutenberg (the PHP + HTML option shows as “Coming Soon”)
Before You Start
- You need to be logged in as a site Administrator. On a multisite network, only Network (Super) Administrators can edit widget PHP.
- If your site sets
DISALLOW_FILE_EDITtotruein wp-config.php, PHP editing is turned off and you will see: “Widget PHP editing is disabled because this site sets DISALLOW_FILE_EDIT.” A site owner (developer) can re-enable it with thewdkit_allow_php_when_file_edit_disabledfilter. - The editor type is chosen when you create a widget and cannot be changed later. To move an HTML widget to PHP, create a new widget with the PHP + HTML type.
Step 1: Create a PHP + HTML Widget
New to the Widget Builder? Start with How to Create Custom Elementor Widget using Free WDesignKit Widget Builder to learn the builder layout and controls.
- Go to WDesignKit > Widget Builder > My Widgets.
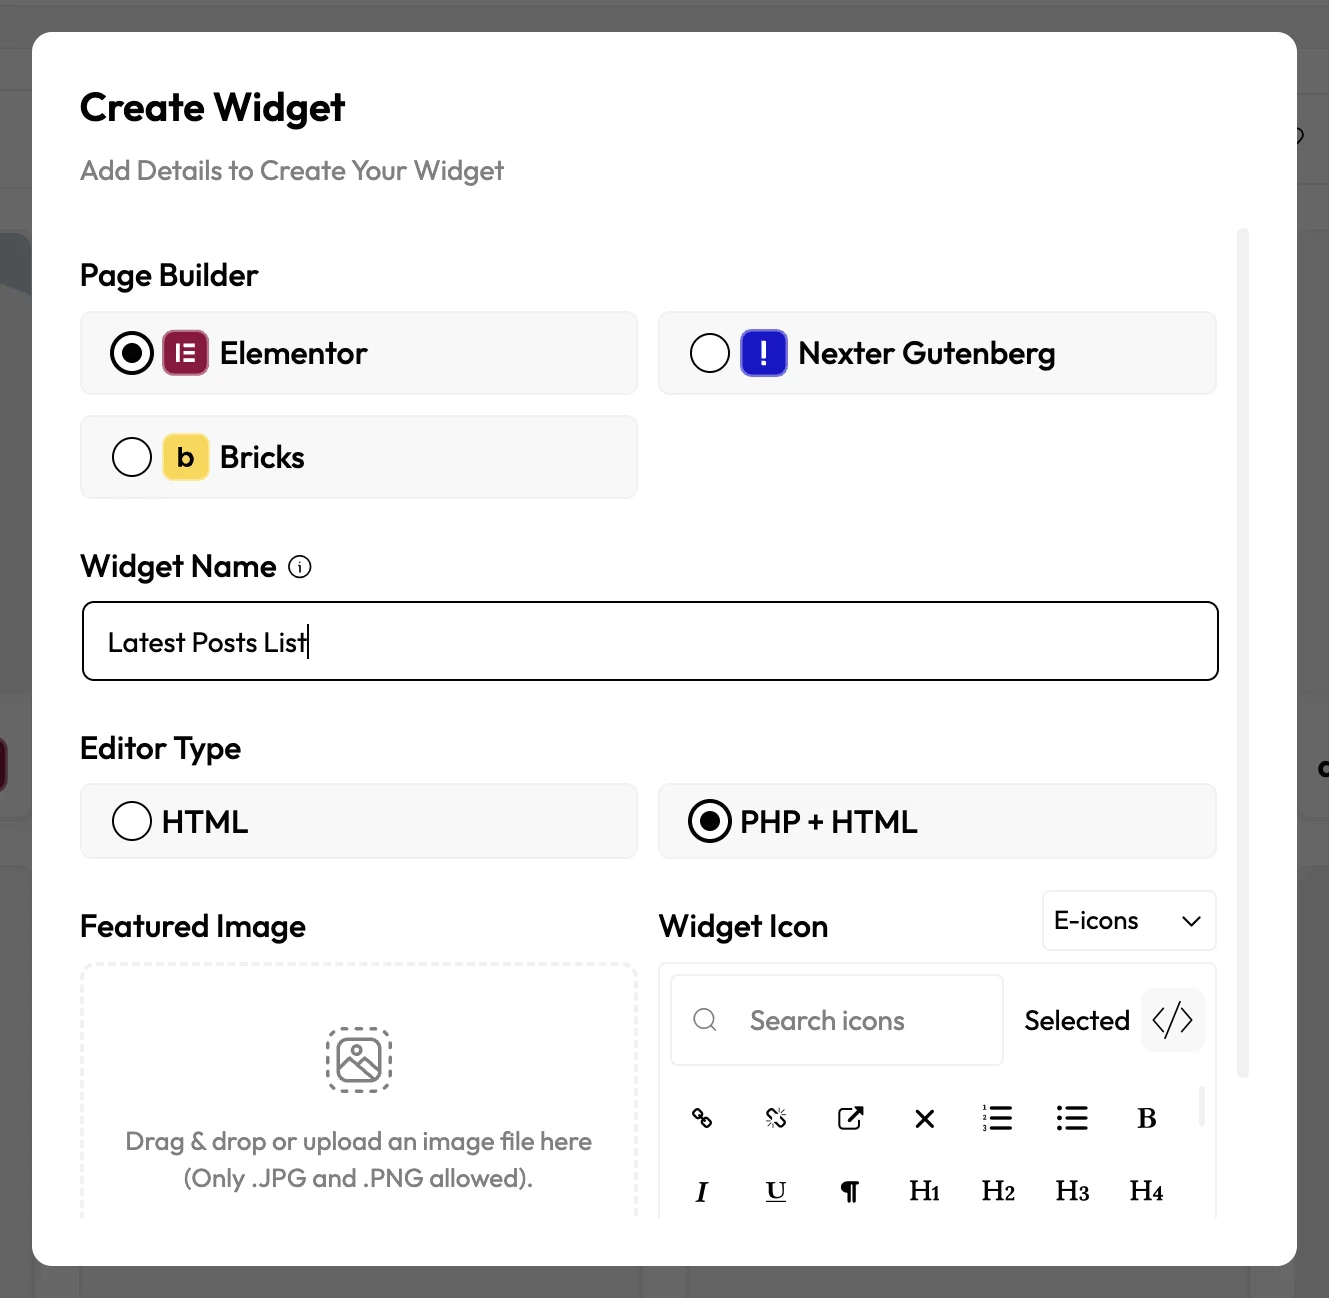
- Click Create Widget.
- Enter the widget name and pick your builder (Elementor or Bricks).
- Under Editor Type, select PHP + HTML.
- Click Create. The builder opens with a PHP + HTML tab in place of the HTML tab, along with the CSS and JavaScript tabs.
Step 2: Write Your PHP
The PHP + HTML pane starts with an opening <?php tag and a short example comment. Write your logic and echo the output you want to show.
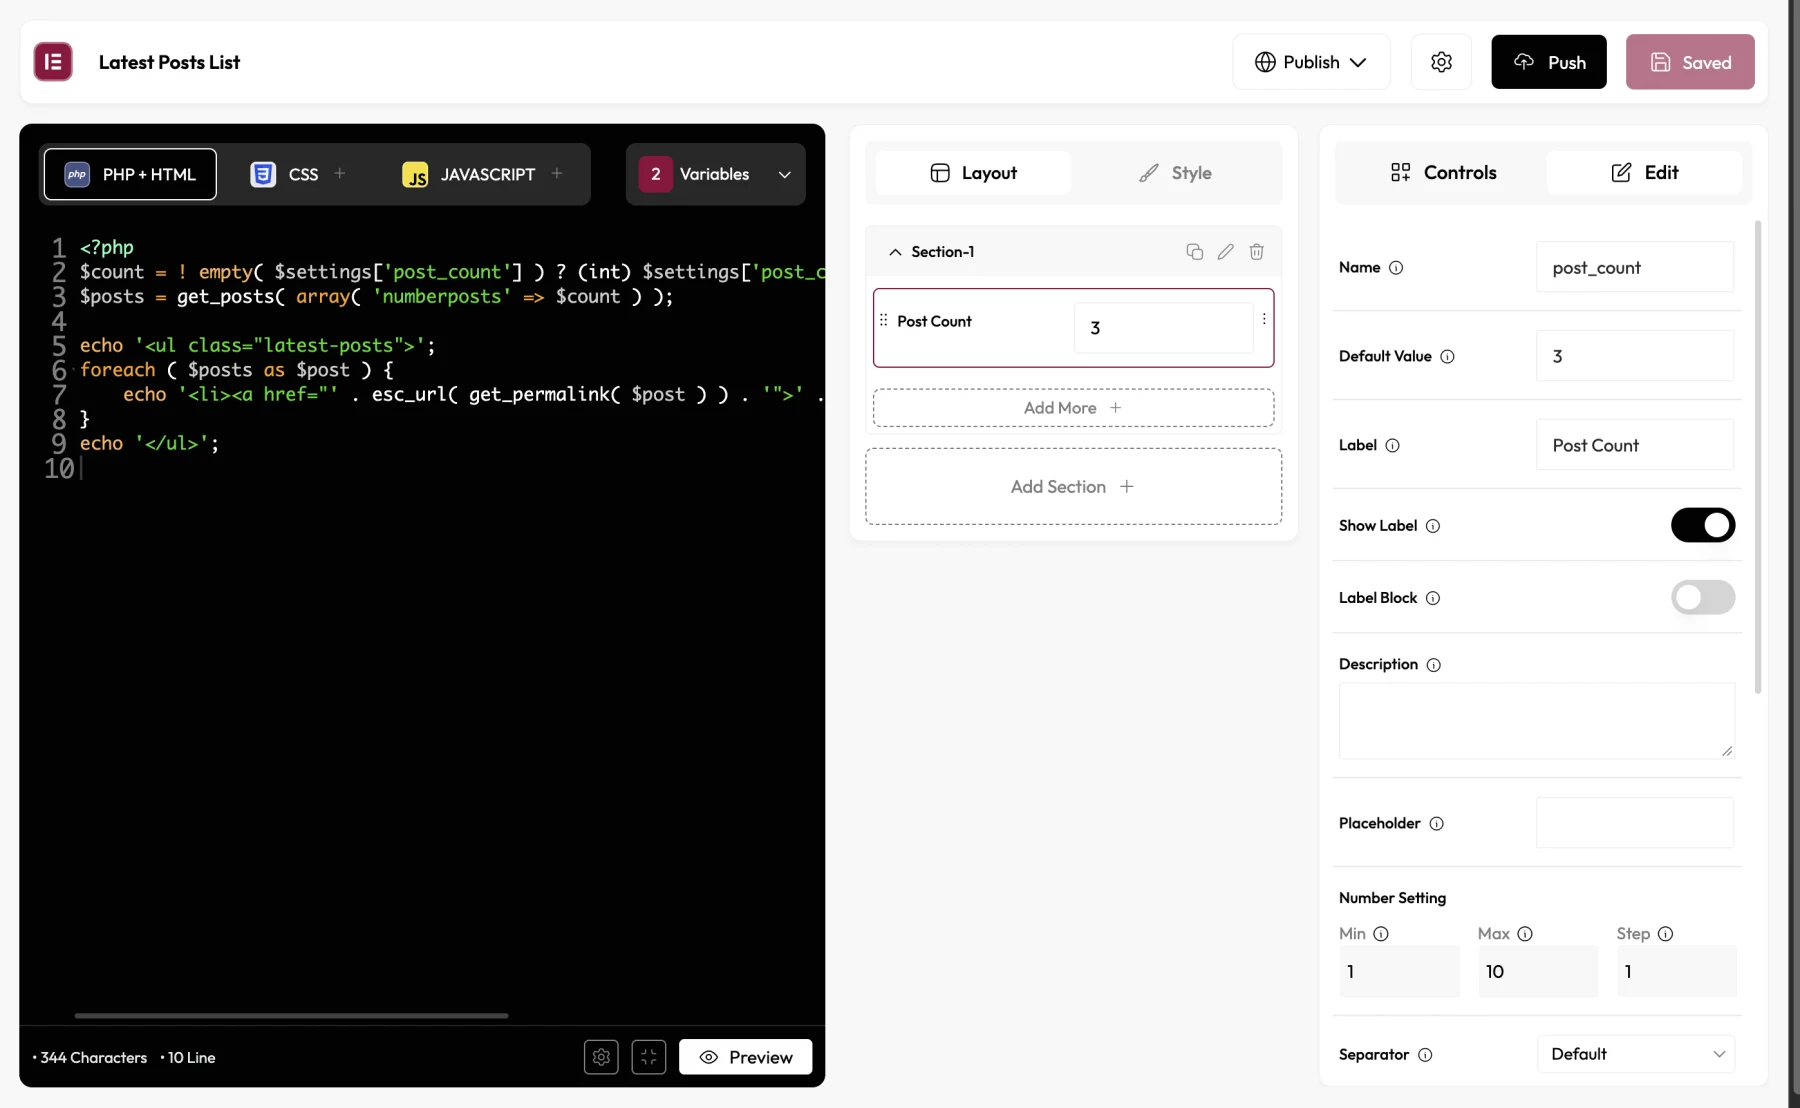
Example: show the latest posts as links. The number of posts comes from a Post Count number control (name post_count, default 3) added in the Layout tab.
<?php
$count = ! empty( $settings['post_count'] ) ? (int) $settings['post_count'] : 3;
$posts = get_posts( array( 'numberposts' => $count ) );

echo '<ul class="latest-posts">';
foreach ( $posts as $post ) {
    echo '<li><a href="' . esc_url( get_permalink( $post ) ) . '">' . esc_html( get_the_title( $post ) ) . '</a></li>';
}
echo '</ul>';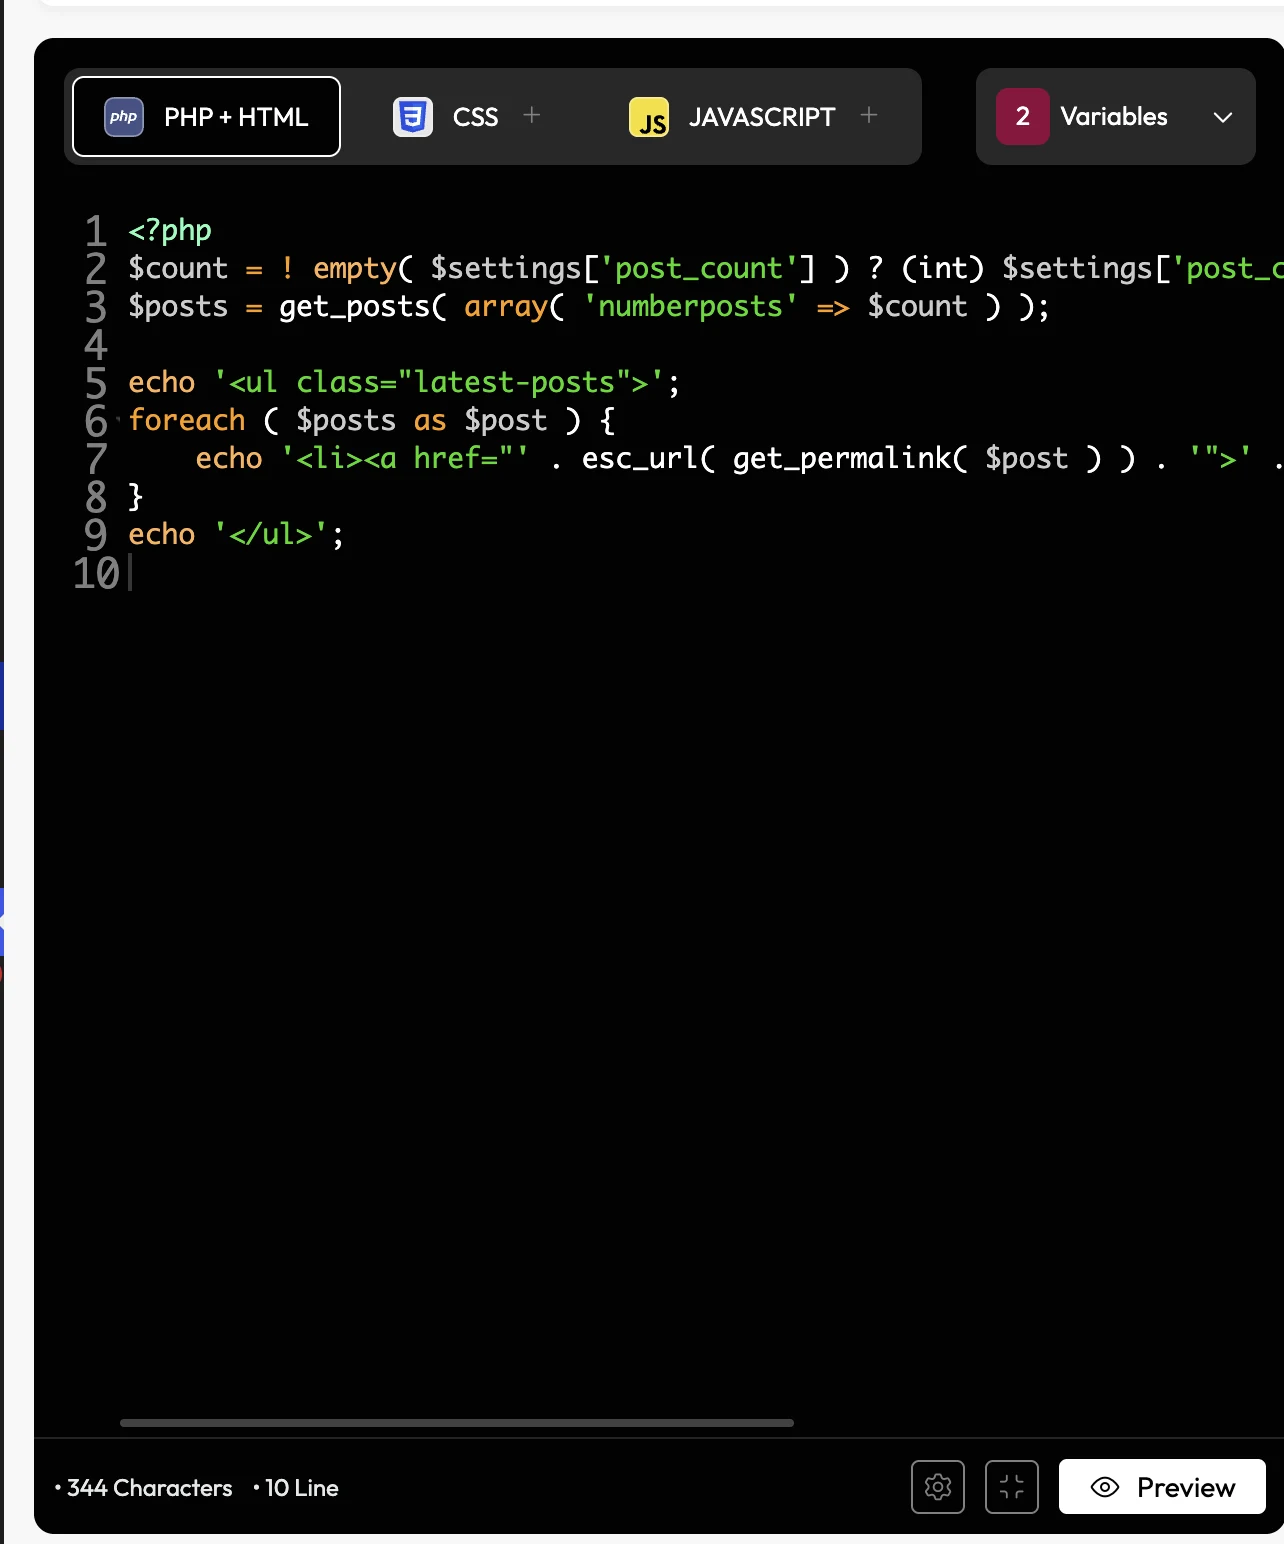
Using Your Widget Controls
Values from the controls you add in the Layout tab are available in the $settings array, using each control’s Name. For a control named post_count, write:
$settings['post_count']The Variables dropdown lists the control names in your widget, so you can check the exact name to use. To show or hide a control based on another control, see How to Use Display Conditions to Show or Hide Controls.
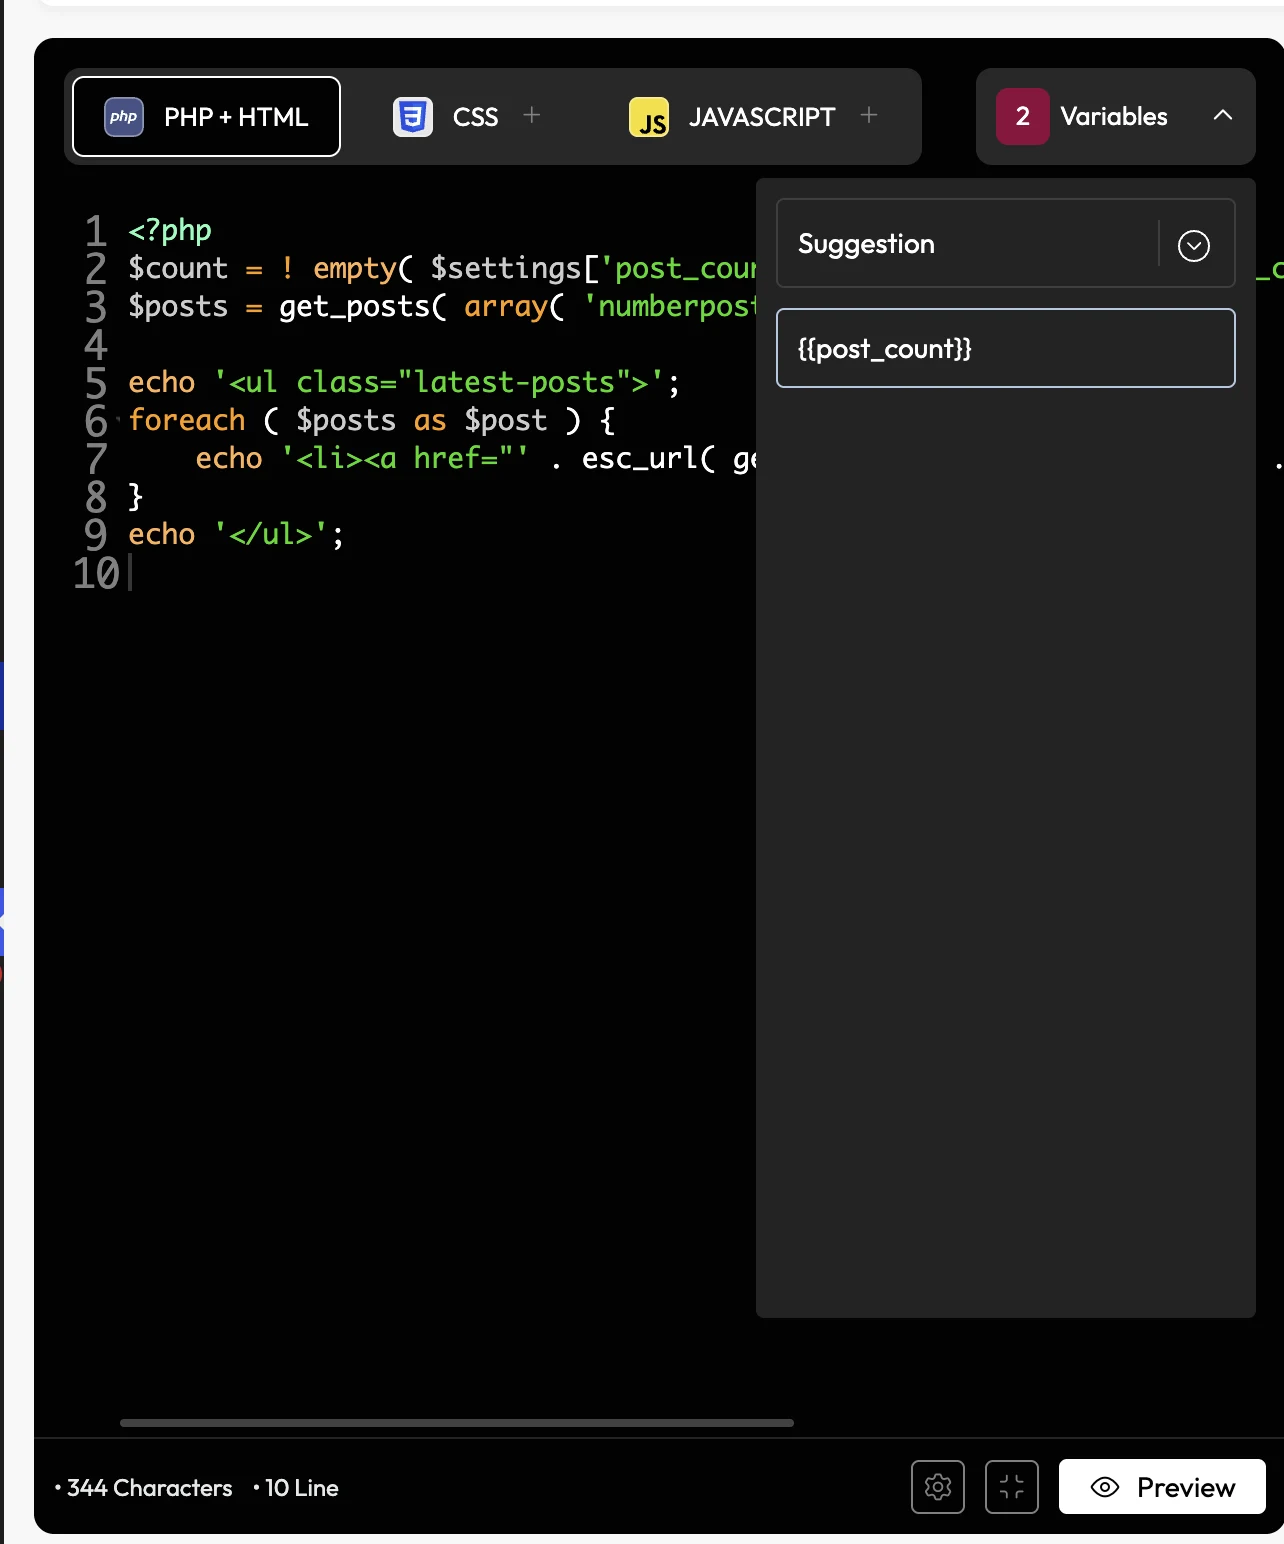
The dropdown shows names in the
{{post_count}}format, which is for the HTML editor. In the PHP + HTML pane, always write the name as$settings['post_count'].
Styling and Scripts
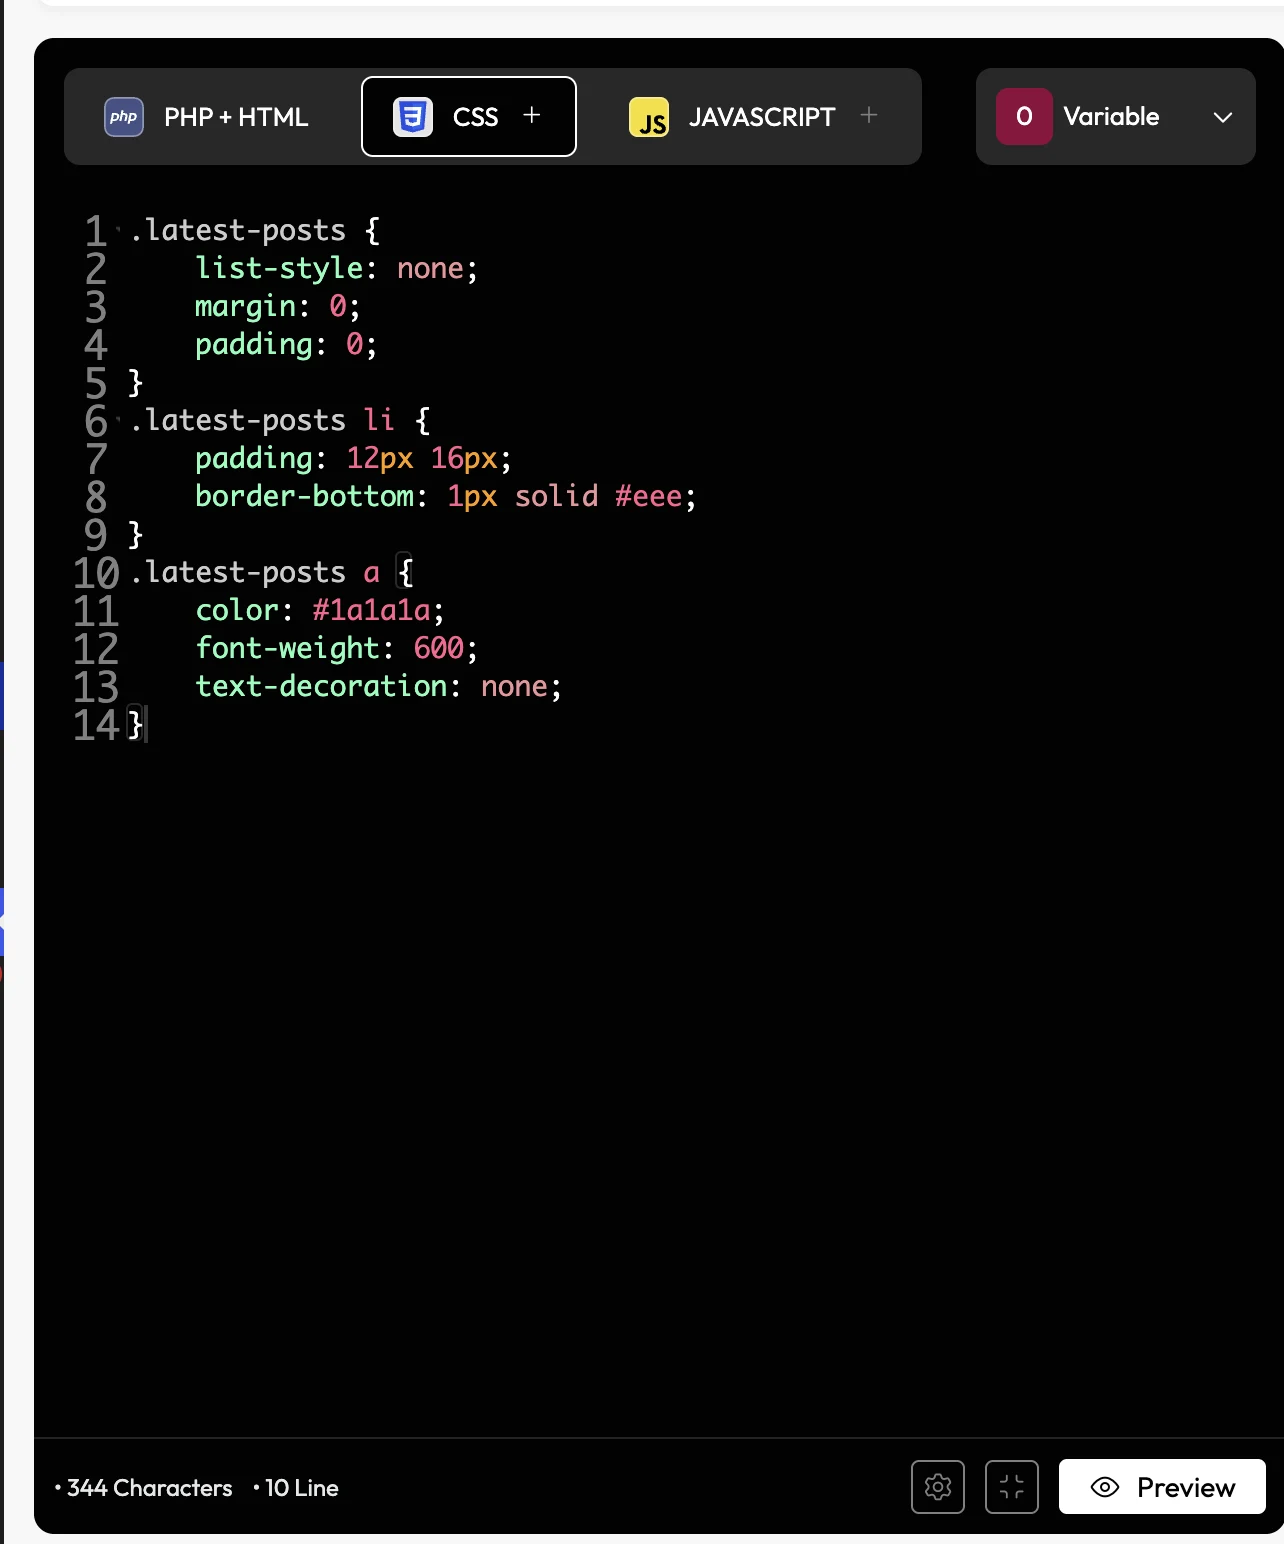
Add styles in the CSS tab and scripts in the JavaScript tab. Both apply to the markup your PHP outputs. To keep them from affecting other widgets on the page, see How to Make the Widget CSS Unique to the Widget and How to Make the Widget JS Unique to the Widget.
Step 3: Save and Preview
- Click Save. WDesignKit checks your PHP before saving.
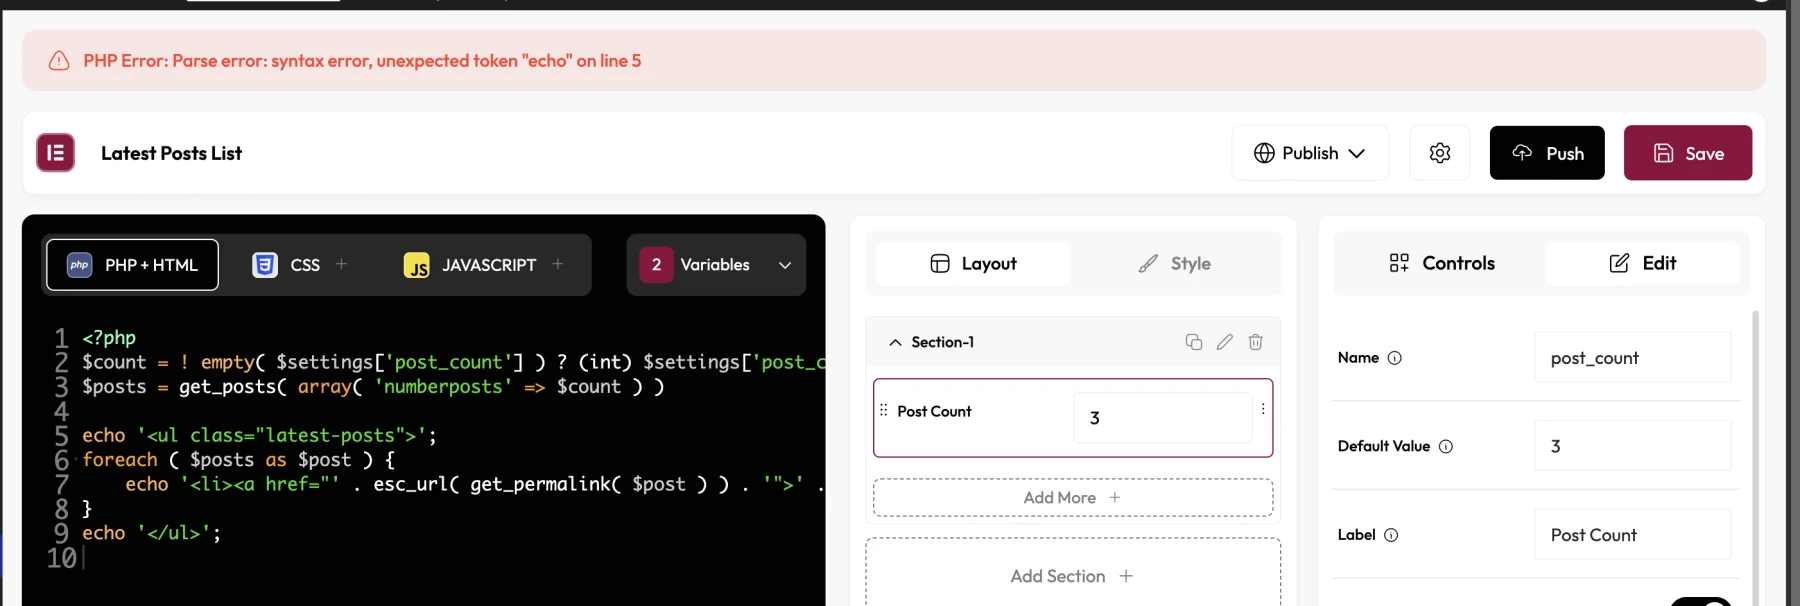
- If there is a syntax error (for example, a missing semicolon), the save is blocked and a red banner shows the error, such as:
PHP Error: Parse error: syntax error, unexpected token ... on line N
The line number may be off by one or two from the line in the pane. Check the lines just above it.
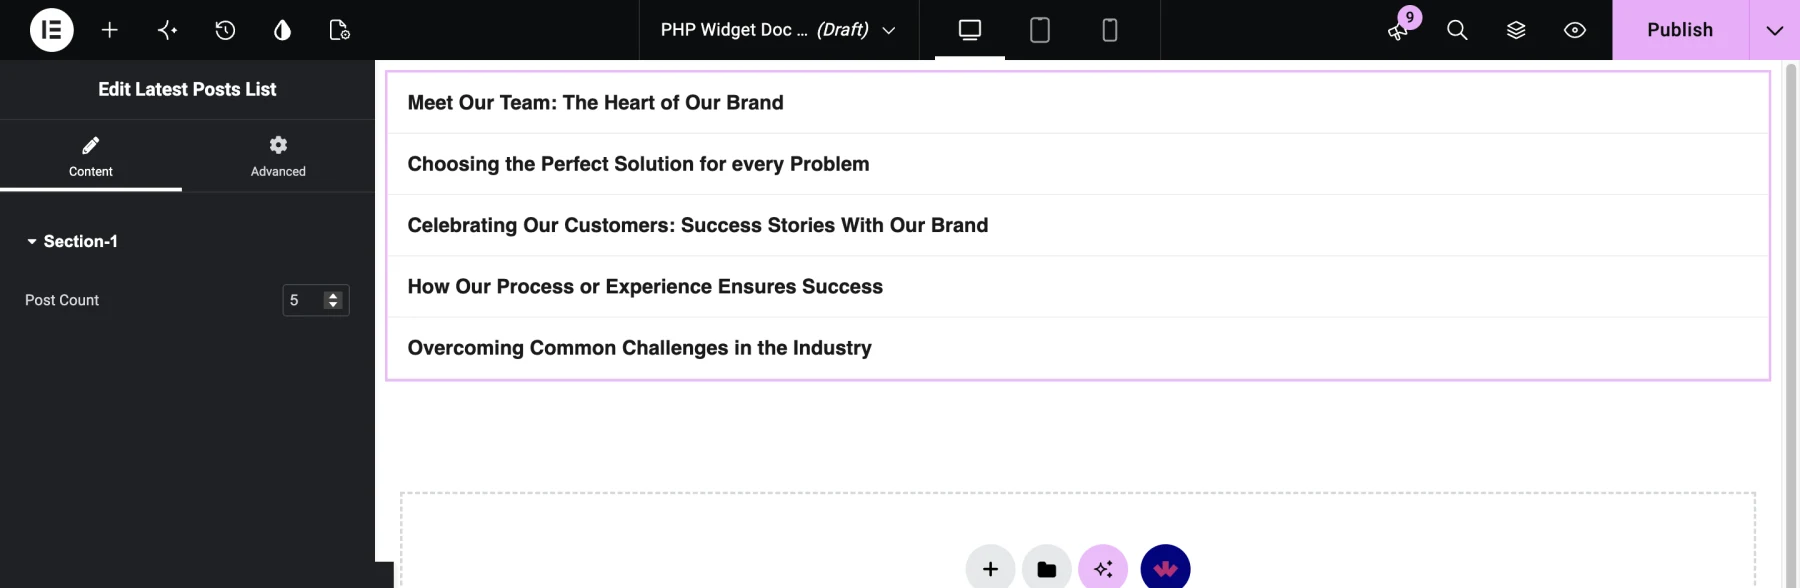
- Click Preview. The output can take around 10 to 15 seconds to appear.

Once saved, your widget appears in the Elementor or Bricks widget panel like any other WDesignKit widget.
Step 4: Push to WDesignKit Cloud (Optional)
Click Push to sync the widget to your WDesignKit Workspace so you can reuse it on other sites or share it with your team. You can also download the widget as a WordPress plugin.

Best Practices
- Escape everything you output. Use
esc_html(),esc_attr(),esc_url()andwp_kses_post(). - Named functions: a widget can appear more than once on a page, so a plain
function my_func()would be declared twice and break the page. Wrap it inif ( ! function_exists( 'my_func' ) ) { ... }, or use a closure instead. - Use
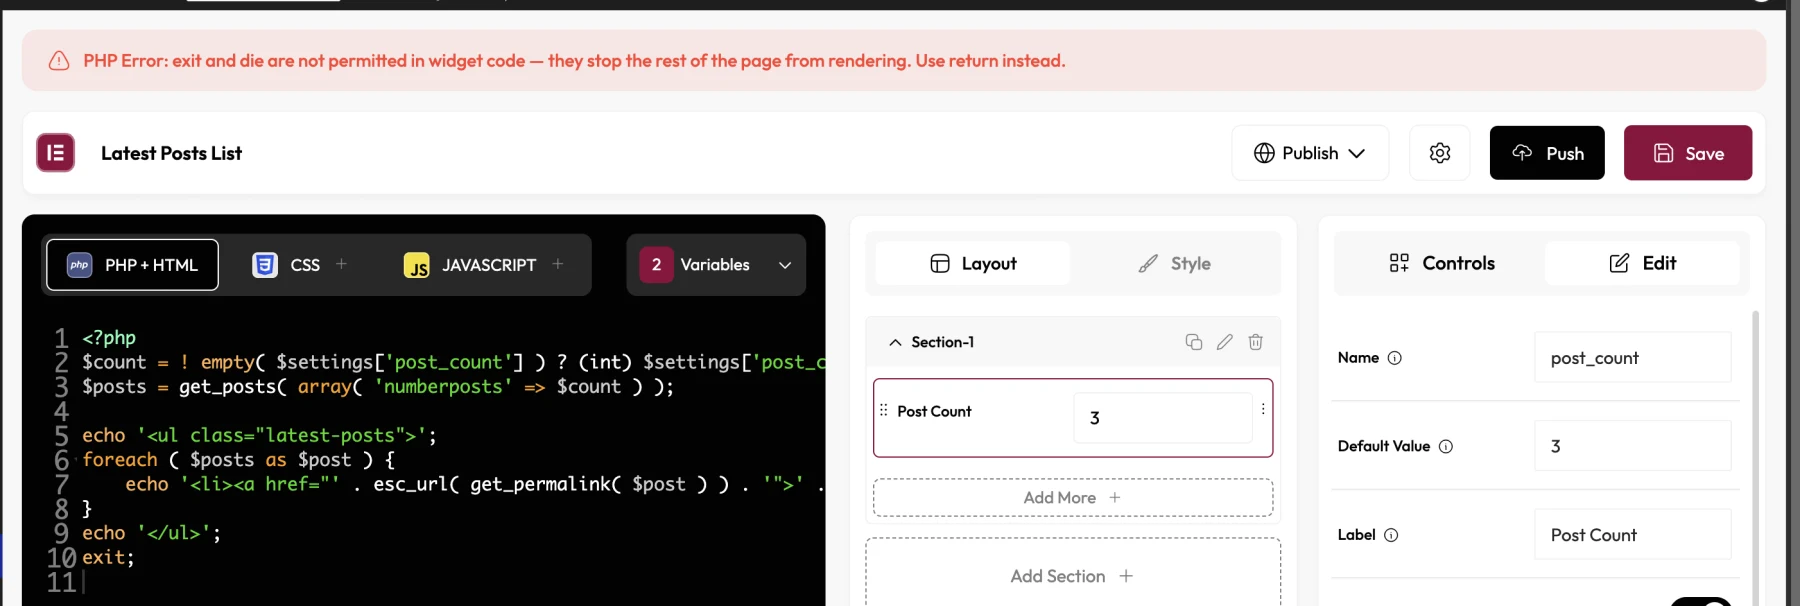
return, notexitordie. To stop the widget early, usereturn;. - Do not close and reopen PHP tags (
?> ... <?phpor<?=) inside the pane. Build your HTML as strings andechoit. - Keep it light. Heavy queries run on every page load where the widget is used. Cache results with transients when you can.
- If a widget breaks: if a widget file ends up with a PHP syntax error, WDesignKit skips that widget so your site keeps loading, and shows a notice on the WordPress Dashboard. Open the widget, fix the code and save again.
What the PHP Editor Does Not Allow
To keep your site safe, WDesignKit checks your code on every save and blocks the following. If your code uses any of them, the save is stopped and the banner tells you which one.
| Not allowed | Examples | Use instead |
|---|---|---|
| Running server or shell commands | exec(), shell_exec(), system(), passthru(), proc_open(), popen(), backticks | Not supported in widgets |
| Running code from strings | eval(), assert(), create_function() | Write the code directly |
| Loading other PHP files | include, require, include_once, require_once | Put the code in the widget |
| Writing or changing files | file_put_contents(), fopen(), fwrite(), unlink(), rename(), copy(), mkdir(), chmod(), WP_Filesystem, ZipArchive | Store data with update_option(), post meta or transients |
| Stopping the page | exit, die | return; |
| Declaring classes, interfaces or traits | class My_Helper {} | Closures or function_exists()-wrapped functions |
| Changing PHP settings | ini_set(), putenv(), set_include_path(), dl() | Not supported in widgets |
| Sending mail directly | mail(), mb_send_mail() | wp_mail() |
| Dynamic function calls | $func(), variable variables ($$name), extract(), call_user_func( $var ) | Call functions by name, or pass a closure |
| Writing to log files | error_log() with a file destination | error_log( 'message' ) only |
Functions that take a callback (
array_map(),usort(),add_action(),add_filter()and similar) are allowed when you pass a closure or a plain function name.
Keep API Keys and Secrets Out of the PHP Editor
If your widget calls an external service, such as a payment gateway, Google Maps, OpenAI or a CRM, do not paste the API key, token or password directly into the PHP Editor.
Why: widget code is saved as files in wp-content/uploads/wdesignkit/. It is also included when a widget is exported, duplicated, shared or synced to your WDesignKit Workspace. A key written into the widget code travels with the widget wherever it goes. On a misconfigured server, it could even be downloaded by anyone who knows the file URL.
Store the key in your site’s wp-config.php file instead, and read it in the widget by its name.
Add the Key to wp-config.php
Open wp-config.php in your site’s root folder and add your key above the line /* That's all, stop editing! Happy publishing. */:
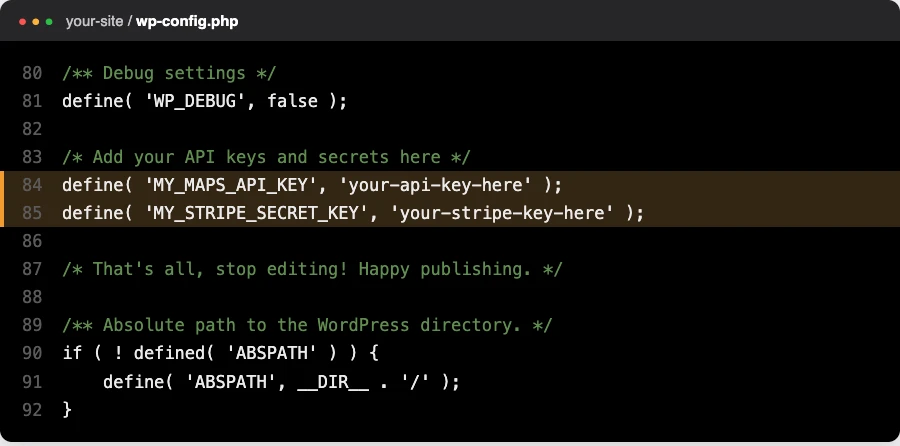
define( 'MY_MAPS_API_KEY', 'your-api-key-here' );Use a clear, unique name for each key, for example MY_STRIPE_SECRET_KEY or MY_CRM_TOKEN.
Use the Key in the PHP Editor
Refer to the key by its name. Do not use the key value itself:
<?php
$api_key = defined( 'MY_MAPS_API_KEY' ) ? MY_MAPS_API_KEY : '';

if ( empty( $api_key ) ) {
    echo esc_html__( 'Maps API key is missing. Add it to wp-config.php.', 'your-text-domain' );
    return;
}

$response = wp_remote_get(
    add_query_arg(
        array(
            'address' => 'New York',
            'key'     => $api_key,
        ),
        'https://maps.googleapis.com/maps/api/geocode/json'
    )
);
Good to Know
- Never print a secret key on the page. Use it only in server-side requests, as shown above. Anything you echo is visible in the page source.
- When you share or export a widget, the other site needs its own key in its own
wp-config.php. Your key is not shared with the widget. - If a key was ever saved in widget code, treat it as exposed. Remove it from the widget, generate a new key in the service’s dashboard, and put the new key in
wp-config.php. - If you cannot edit
wp-config.php, ask your hosting provider. Many hosts also let you set environment variables, which you can read withgetenv( 'MY_MAPS_API_KEY' ).
FAQ
Is the PHP Editor free?
Yes, it is available to all WDesignKit users.
Can I use it with Gutenberg?
Not yet. PHP + HTML widgets currently work with Elementor and Bricks.
Can I switch an existing HTML widget to PHP + HTML?
No. The editor type is set when the widget is created. Create a new PHP + HTML widget and copy your markup into it.
Can I convert a PHP widget from Elementor to Bricks?
Yes. Use the convert option on the widget; your PHP code is kept.
Why does my save fail with a PHP Error?
Either your code has a syntax error, or it uses something the editor does not allow (see “What the PHP Editor Does Not Allow”). Read the message in the red banner, fix that part, and save again.
I see “You do not have permission to edit widget PHP”. Why?
Only Administrators can edit widget PHP (Network Administrators on multisite). Ask your site admin.
I see “Widget PHP editing is disabled because this site sets DISALLOW_FILE_EDIT”.
Your site has file editing turned off in wp-config.php. Ask your developer or host; they can allow it with the wdkit_allow_php_when_file_edit_disabled filter.