
How Does the Widget Builder Work with MCP?
On this page
WDesignKit’s Widget Builder connects to AI tools like Claude, ChatGPT, Cursor, VS Code, and Windsurf through WordPress MCP, the plugin that bridges your WordPress site to MCP. Once WordPress MCP has your site connected, your AI assistant can create, edit, and manage WDesignKit widgets directly, just by describing what you want in plain language.
Instead of manually adding controls, writing PHP, CSS, and JS by hand, you can ask your AI assistant to build the widget, and it works through WDesignKit’s widget-building actions. The result is a real, working widget that appears in My Widgets, ready to use in Elementor, Gutenberg, or Bricks.
What Is the Widget Builder MCP Integration?
WDesignKit exposes a set of actions for creating, updating, and managing widgets. When your AI tool is connected to your site through WordPress MCP, it can see and call these actions the same way it would call any other tool. This is not a separate connection to set up. It uses the same WordPress MCP connection you already have for your site.
For full MCP setup steps, workflow examples, troubleshooting, and the complete abilities catalog, see the MCP Help Center.
Requirements Before You Start
| Requirement | Details |
|---|---|
| WDesignKit | Installed and activated on your site. |
| WordPress MCP | Installed, activated, and your site connected to your AI tool through it. |
| MCP Connection | Your AI tool (Claude, Cursor, ChatGPT, and so on) already connected to your site via WordPress MCP. |
| User Role | Administrator. Widget-building actions require admin-level access. |
Important: If you have not connected an AI tool to your site yet, set that up first through WordPress MCP. See How MCP Works in WDesignKit & WordPress MCP for the step-by-step guide to connecting your site. The Widget Builder becomes available to your AI tool automatically once that connection exists and WDesignKit is active.
How to Create a Widget Using Your AI Assistant
- Open your connected AI tool (Claude Desktop, Cursor, and so on) in a chat with your site.
- Describe the widget you want in plain language. For example: “Create an Elementor widget called ‘Testimonial Card’ with a name field, a quote field, and a star rating.”
- Your AI assistant creates the widget using the details it gathered from your prompt (name, target builder, description, and so on).
- WDesignKit generates the widget’s PHP, CSS, and JS files, along with its control panel configuration, and saves it to your library.
- Open your page builder (for example, Elementor) and search for the widget by name. It appears alongside your other widgets, ready to drag onto the page.
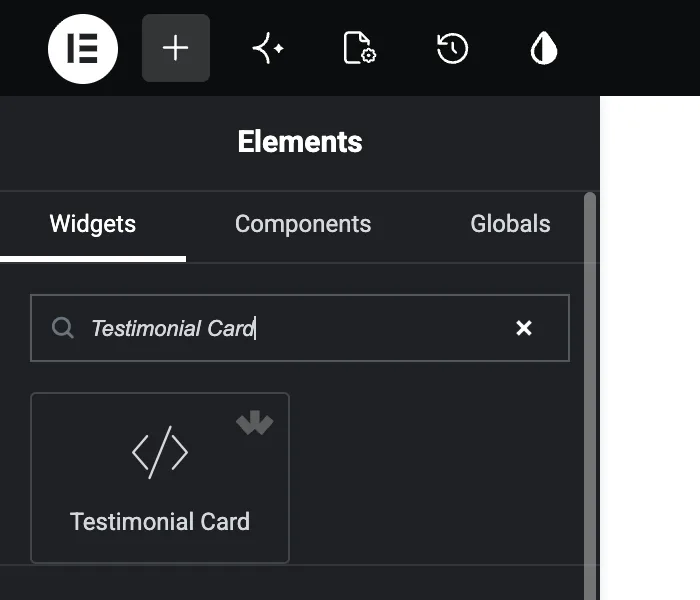
Your AI can also ask you follow-up questions (which builder to target, what fields the widget needs) before it creates the widget, depending on how you phrase your request.
What Your AI Can Specify When Creating a Widget
| Field | Required | What It Controls |
|---|---|---|
| Name | Required | The widget’s display name. Letters, numbers, spaces, hyphens, and underscores only, up to 64 characters. |
| Builder | Required | Which builder the widget targets: Elementor, Gutenberg, Gutenberg Core, or Bricks. |
| Description | Optional | Shown in the widget’s config and as placeholder text. Auto-generated from the name if left out. |
| Category | Optional | Must match an existing category in your library. Defaults to “WDesignKit.” |
| Icon | Optional | The icon shown next to the widget in the library. Defaults to a generic code icon. |
| Keywords | Optional | Search terms so you can find the widget later. |
| PHP / CSS / JS Code | Optional | Your AI can supply complete custom code for any file. Anything left out is generated automatically with working boilerplate. |
| CDN Links | Optional | External JS or CSS libraries the widget depends on (for example, a Swiper or GSAP CDN link). |
| Version | Optional | Defaults to 1.0.0. |
Tip: You do not need to specify code at all. If you only describe the widget in words, WDesignKit generates a complete, working widget with sensible defaults, which you can then refine.
Managing Widgets After Creation
Once a widget exists, your AI assistant can keep working with it:
- Update it: ask your AI to change a widget’s fields, styles, or behavior.
- Convert it: move a widget from one builder to another (for example, Elementor to Gutenberg).
- Duplicate it: create a copy to experiment on without touching the original.
- Preview it: see how the widget renders before using it on a page.
- Push it to the cloud: save the widget to your WDesignKit cloud account so it is available across sites.
- Export or download it: get the widget as a portable file, or package it as a standalone WordPress plugin (see Download a Widget as a WordPress Plugin).
FAQ
Do I need a separate connection for the Widget Builder?
No. It uses the same WordPress MCP connection you already set up to manage your site. There is nothing extra to install or configure beyond having WDesignKit active and WordPress MCP connected.
Can any user create widgets through their AI assistant?
No. Widget-building actions require an administrator-level connection through WordPress MCP.
What happens if I do not specify any code?
WDesignKit generates complete, working PHP, CSS, and JS boilerplate for the builder you chose, so the widget is usable immediately. You or your AI assistant can refine it afterward.
Where can I learn more about MCP and everything it can do in WDesignKit?
See the MCP Help Center for setup, workflows, troubleshooting, and the full abilities catalog.
Conclusion
The Widget Builder’s MCP integration turns widget creation into a conversation. Describe what you want, and your connected AI assistant builds it directly in your WDesignKit library, using WordPress MCP to carry the request through.