
How to Install WDesignKit WordPress Plugin?
On this page
- What It Does
- Why It Matters
- What You Get
- Benefits
- Capabilities
- How It Works
- How to Use It
- 1. Install and Activate WDesignKit Plugin
- 2. How to Check If a Widget Is Free or Pro
- 3. How to Sign Up or Upgrade to a Pro Plan
- If the Widget is Free
- If the Widget is Pro
- 4. How to Download a Widget by Name or Widget ID
- 5. How to Use WDesignKit Widgets in Elementor, Gutenberg, or Bricks Builder
- Elementor Widget Builder
- Nexter Widget Builder
- Bricks Widget Builder
- 6. How to Edit a Widget for More Customization
- 7. Templates (Browse Templates & My Templates)
- Steps to Use Templates:
- Filter Options:
- Import Template:
- Use Case:
- 8. Snippets (Browse Snippets & My Snippets)
- Steps to Use Snippets:
- Snippet Types:
- Filter Categories:
- Common Use Cases:
- Use Case:
- 9. How to Store Templates, Widgets, and Snippets on Cloud and Share With Your Team (Using Workspace)
- 10. Settings (Manage Licence & General Settings )
- 10.1 Manage Licence (License Activation -Unlock Pro Features)
- 10.2 General Settings (Customization)
- Use Cases
- Limitations
- Troubleshooting
What It Does
WDesignKit is a widget, template, and code-snippet builder plugin for Elementor, Gutenberg (Nexter Blocks), Gutenberg Core, and Bricks. Installing and activating it adds a WDesignKit dashboard to wp-admin, from which every other WDesignKit feature covered in this guide is reached.
Why It Matters
Every other WDesignKit doc, widgets, templates, code snippets, Workspace, licensing, assumes the plugin is already installed, active, and, for Pro features, licensed. Getting this first step right avoids the two most common support requests: a Pro widget that will not activate, and a WDesignKit menu that never appears in wp-admin.
What You Get
- A WDesignKit dashboard in wp-admin with access to the free widget, template, and snippet library.
- A path to activate a Pro licence for premium widgets, templates, and Workspace features.
- A single Settings screen covering builders, feature toggles, licensing, data sharing, and white-label branding.
Benefits
- One plugin instead of separate builder-specific add-ons for Elementor, Gutenberg or Nexter Blocks, Gutenberg Core, and Bricks.
- A free plan lets you evaluate widgets and templates before buying a Pro plan.
- Centralized licence and settings management once the plugin is installed and active.
Capabilities
- Works with Elementor, Gutenberg (Nexter Blocks), Gutenberg Core, and Bricks, each with its own on/off toggle in Settings > Widget Builders.
- Widget Builder, Design Templates, and Code Snippet modules can each be switched off independently from Settings > Features Manager.
- Pro plans unlock Pro widgets, Pro templates, more Workspace storage, and White Label branding; plan names and limits are set on wdesignkit.com/pricing and can change, so verify there before purchasing.
How It Works
Installing WDesignKit from the WordPress plugin repository registers its dashboard, widgets, templates, and settings inside wp-admin. Activating a Pro licence key checks it against WDesignKit’s cloud, and on success unlocks Pro widgets, templates, and Workspace limits for that site without any further installation step.
How to Use It
To access all the features of WDesignKit, you have to install and activate the WDesignKit WordPress plugin.
1. Install and Activate WDesignKit Plugin
1. From the WordPress Dashboard, go to Plugins > Add Plugin.
2. In the search field, search for “WDesignKit“.
3. You’ll see the WDesignkit plugin; click on the Install Now button.
4. Once installed, click on the Activate button.
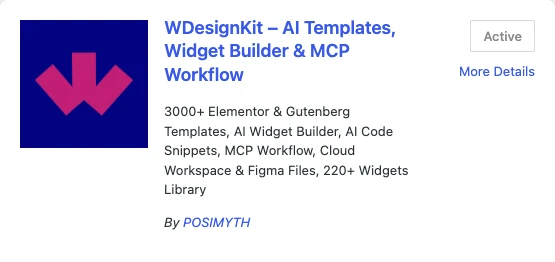
Once activated, you will see the WDesignKit Dashboard in your WordPress panel.
2. How to Check If a Widget Is Free or Pro
WDesignKit offers both free and pro widgets. Before downloading a widget, check its availability.
- Open the WDesignKit Dashboard.
- Navigate to the Widgets > Browse Widgets section.
- You can see the full list of widgets. Any widget with a ‘PRO‘ tag is a Pro widget, and the ones without the tag are free widgets.
This helps you easily understand which widgets you can access based on your plan.
Note: Pro widgets will not activate unless your Pro license is active.
3. How to Sign Up or Upgrade to a Pro Plan
If the Widget is Free
- Click Sign Up inside the WDesignKit plugin.
- Create your free account to unlock free widgets and basic features.
If the Widget is Pro
- Go to the Pricing page from the plugin or WDesignKit website.
- WDesignKit offers three Pro plans: Starter, Professional (Most Popular), and Studio.
Each plan includes different features such as:
- Number of active websites
- Number of templates, widgets, and blocks
- Storage credits
- Workspace access
- Design files
- Access to builders and other advanced tools
- After reviewing the features, simply click the Buy Now button under the plan you want to purchase.
- After clicking Buy Now, you will be redirected to the checkout page.
- Enter your billing details, email, and payment information.
- If you have a promo code, you can enter it during checkout to redeem the current offer or discount.
Click Apply to ensure the promo is successfully added. - After filling in your details and applying any promo code, click Complete Purchase to finish the payment.
- Once the payment is successful, your Pro subscription becomes active.
- Then, you will see a Download button on the screen. Click on Download to view the “Order Successful” message.
- Scroll down the page to find the latest download version of the plugin. Click on the file to download it to your device.
- You will also see your License Key displayed. Copy the license key.
- Go to your WDesignKit Plugin Panel in WordPress. Click on the Settings > Manage Licence section,
- Then you’ll see an Add License Key field. Select the WDesignKit Plugin if it’s not already selected, paste the license key into the field, and click the Activate button. After that, you will see a success message along with the license key credits.
Now, you can enjoy all the Pro Widgets on your site.
4. How to Download a Widget by Name or Widget ID
Each widget on WDesignKit has a name and a unique widget ID for easy identification.
1. The widget is now ready to use inside your page builder.
2. Open the Widgets → Browse Widgets section in the WDesignKit plugin.
- Widget Name => You will see the full list of widgets on your dashboard. Choose any widget you want to use and search for it by name in the search bar. For example, let’s take the Sparkle Text Widget for Elementor.
- Widget Unique ID => To find the Unique ID, hover over the widget name on the bottom-left corner, and you will see the widget URL containing its ID.Example: Sparkle Text Widget Unique ID → 12059. Enter this ID into the search bar to instantly filter and display that specific widget on the screen.
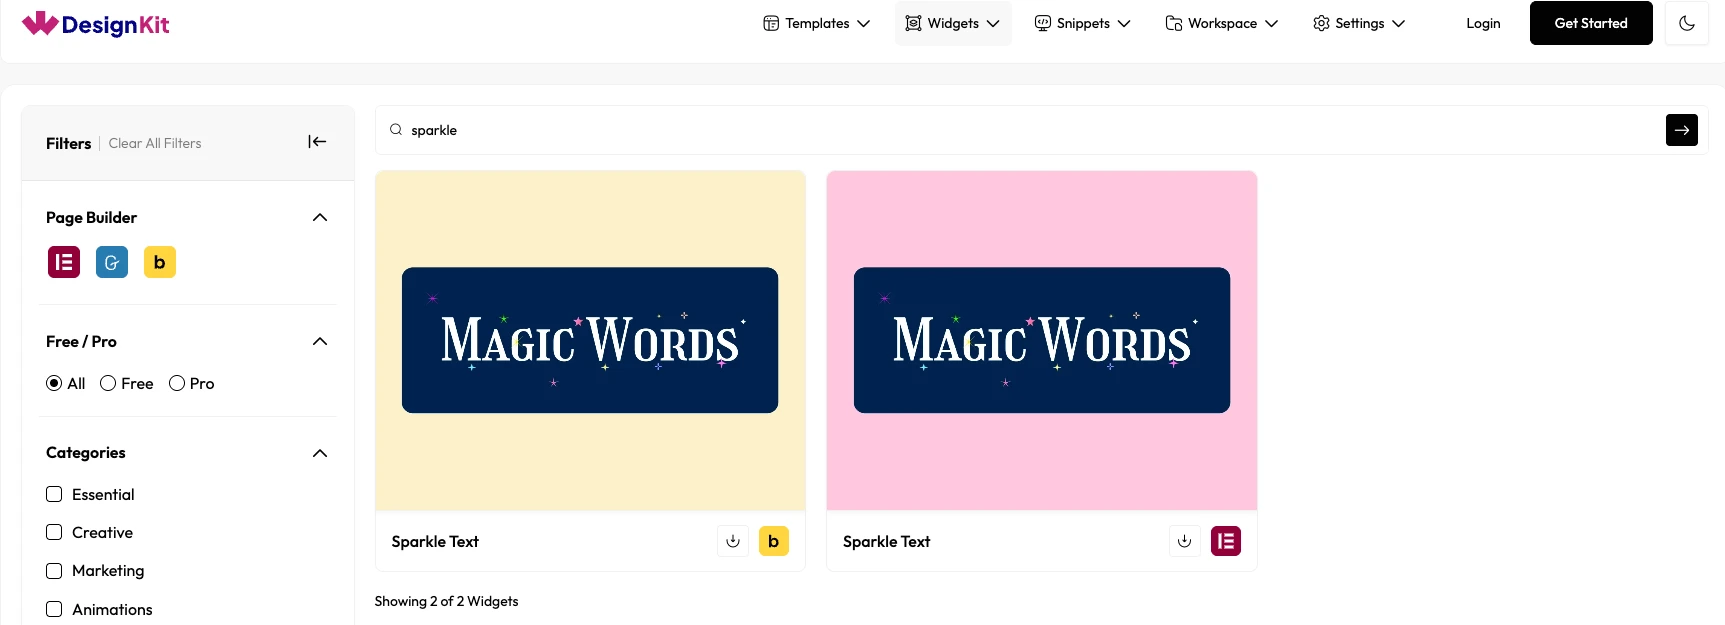
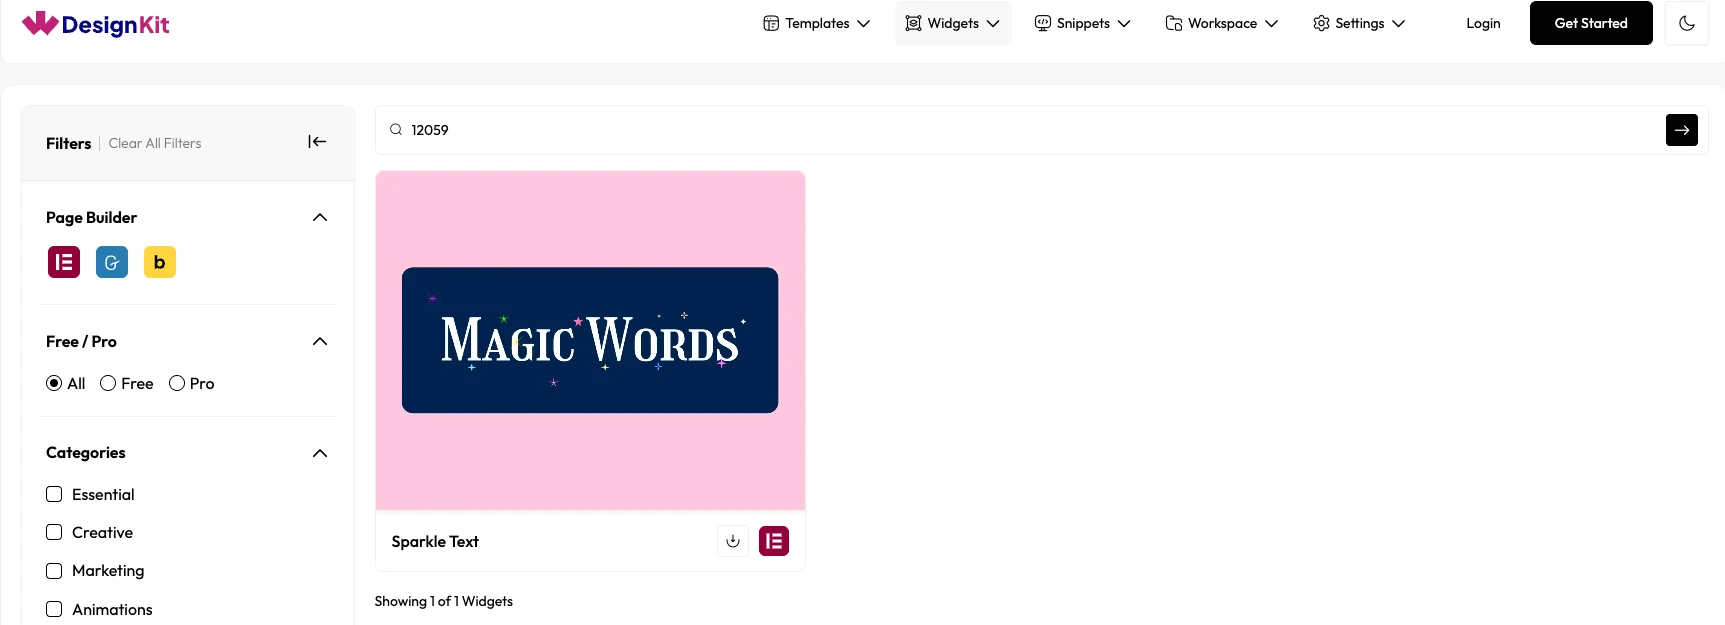
3. Then, click the Download Icon to add the widget to your website library.
4. The widget is now ready to use inside your page builder.
5. How to Use WDesignKit Widgets in Elementor, Gutenberg, or Bricks Builder
We will show you an example of how you can add a specific widget, block, or element to your site. First, make sure that the widget, block, or element is downloaded from your WDesignKit panel. After downloading that,
Elementor Widget Builder
- Open the page in Elementor Editor.
- In the widget panel, you can search for the widget by name or scroll to the WDesignKit category to find it.
- Drag and drop any widget into your page design.
Nexter Widget Builder
- First, make sure that the block is downloaded from your WDesignKit panel.
- Then, open the page in the Block Editor.
- Click Add Block (+).
- Drag and drop any block into your page design.
Bricks Widget Builder
- Open your Page in Bricks Builder.
- Click on the (+) Icon to add any Element to your page.
- Then, search element and drag and drop it to your layout.
Note: since these builder videos were recorded, WDesignKit added a fourth builder toggle, Gutenberg Core (native WordPress blocks), alongside Elementor, Nexter Gutenberg, and Bricks. The videos above still show only the original three.
6. How to Edit a Widget for More Customization
If users want additional options or wish to customize the widget:
- Open the widget in WDesignKit → Widgets → My Widgets.
- Modify its controls, style, or functionality.
- Save the widget and update it across your site.
- Re-use the edited widget in any builder.
This lets users fully tailor the widget to their design or brand requirements.
7. Templates (Browse Templates & My Templates)
Templates allow you to quickly import complete website designs.
Steps to Use Templates:
- Open WDesignKit Dashboard.
- Go to Templates → Browse Templates.
- Browse available template kits.
Filter Options:
- AI Compatible templates
- Page Builder support (Elementor, Gutenberg, Bricks)
- Free or Pro templates
- Template Type (Page Kits, Full Pages, Sections)
Import Template:
- Click the Import/Download button on any template to use it instantly.
Use Case:
Templates are ideal for quickly building full websites without starting from scratch.
8. Snippets (Browse Snippets & My Snippets)
Snippets allow you to add custom functionality without installing additional plugins.
Steps to Use Snippets:
- Go to WDesignKit → Snippets → Browse Snippets.
- Explore available snippets.
Snippet Types:
- Individual Snippets
- Snippet Bundles
Filter Categories:
- General
- Admin
- Performance
- Security
Common Use Cases:
- Disable automatic updates
- Remove WordPress version number
- Enable SVG uploads
- Improve website security
Use Case:
Snippets help you enhance performance and functionality with minimal effort.
9. How to Store Templates, Widgets, and Snippets on Cloud and Share With Your Team (Using Workspace)
WDesignKit Workspace allows you to store, sync, and share widgets across team members or multiple websites.
- Open WDesignKit → Workspace → Manage Workspace.
- You have to create a workspace by clicking on the Create Workspace button.
- Then you’ll see a pop-up where you can enter your workspace name and click on the Create Workspace button.
- Once the workspace is created, you can upload templates, widgets, and snippets.
- Organize your assets efficiently for easy access.
- You can also invite team members and share access for collaboration.
- Use your assets across multiple websites whenever needed.
- Access shared resources easily from the Shared with Me section.
Your workspace provides cloud storage and offers benefits like the following:
Benefits of Workspace
- Smooth team collaboration
- Secure cloud backups
- Quick reuse of widgets across different projects
- Online asset storage
- Simple asset reuse
- Support for working with team members
- Centralized management of all assets
10. Settings (Manage Licence & General Settings )
10.1 Manage Licence (License Activation -Unlock Pro Features)
To access Pro templates, widgets, and advanced features, you need to activate your license.
Steps to Activate License:
- Go to WDesignKit → Settings → Manage Licence.
- Enter your License Key.
- Click Activate.
Result:
- All Pro features, templates, and widgets will be unlocked instantly.
After activating your license, you can manage and customize WDesignKit features from the Settings panel.
10.2 General Settings (Customization)
Steps to Access Settings:
- Go to WDesignKit Dashboard.
- Click on Settings from the top navigation bar.
- Select General Settings.
Available Settings Options:
Features Manager
- Enable or disable specific WDesignKit features as per your needs.
- Helps optimize performance by turning off unused features.
Design Templates
- Customize template-related settings.
- Control how templates behave and integrate with your site.
Widget Builders
- Manage widget builder options.
- Configure compatibility with page builders like Elementor, Gutenberg, or Bricks.
Remove Database
- Clean up WDesignKit-related data from your database.
- Useful when resetting or uninstalling the plugin.
Roll Back
- Revert to a previous version of WDesignKit.
- Helpful if you face compatibility or update issues.
White Label (Pro Feature)
- Rebrand WDesignKit with your own brand name.
- Ideal for agencies and client projects.
Code Snippet
- Enable or disable the Code Snippet module from Settings > Features Manager.
- Disabling it also turns off Browse Snippets, My Snippets, and the Workspace snippet options.
Data Sharing
- A privacy control, off by default, that decides whether WDesignKit sends basic non-sensitive setup information to POSIMYTH.
- See How Does Data Sharing Work in WDesignKit for the full breakdown of what is and is not shared.
Coming Soon Features
- Role Manager
- Error Handling
- Performance
These features are currently under development and will be available in future updates.
Use Cases
- First-time setup on a new WordPress site before building any pages.
- Re-installing after a site migration or on a fresh staging environment.
- Onboarding a new team member who needs one place that explains widgets, templates, snippets, Workspace, and licensing together.
- Testing free widgets and templates before deciding whether to buy a Pro plan.
Limitations
- Pro widgets stay visible but will not activate without an active Pro licence key.
- The plan names and prices shown in this walkthrough come from wdesignkit.com/pricing and can change without a documentation update; always confirm the live pricing page before purchasing.
- Cross-builder widget conversion, for example turning an Elementor widget into a Gutenberg block, is not supported; each widget must be built or downloaded separately per builder.
- Pro checkout steps and marketplace screens change periodically; if a step here does not match what you see, treat wdesignkit.com/pricing and the live plugin screens as authoritative.
Troubleshooting
- Nothing works after activating WDesignKit alongside another plugin. Deactivate other page-builder or widget plugins one at a time to isolate a conflict, then report the specific combination to WDesignKit support.
- Can’t import theme builder settings, or other import issues after installing. This mirrors a real, previously reported WDesignKit support pattern: confirm the source and destination sites are on matching WDesignKit versions before importing, and re-check the import after updating both.
- A Pro widget or template will not activate after purchase. Go to WDesignKit > Settings > Manage Licence and confirm the licence key is entered and shows Active; Pro assets stay locked until that licence check succeeds.