
How to Create Workspace?
On this page
A workspace in WDesignKit is a shared space where you organize templates, widgets, and code snippets, and collaborate with team members. You can create a workspace from either the WDesignKit app or the WDesignKit plugin.
What It Does
Creating a workspace sets up a named, shareable container in your WDesignKit account that holds templates, widgets, and code snippets, and that you can invite team members into.
Why It Matters
Without a workspace, everything you build stays private to your own account. A workspace is what lets you group related work by client or project and let other people on your team see and use it too.
What You Get
A named workspace with an optional thumbnail image, ready to hold templates, widgets, and snippets, and to have team members added to it.
Benefits
Skipped as a distinct section: the concrete benefit (organizing and sharing work with a team) is already covered under Why It Matters and What You Get above.
Capabilities
- Create a workspace from the WDesignKit web app.
- Create a workspace from the WDesignKit WordPress plugin.
- Name the workspace and optionally attach a thumbnail image.
- Each workspace is independent: templates, widgets, and snippets saved in one workspace are not shared with another.
How It Works
Both the app and the plugin call the same cloud workspace system, so a workspace created from either surface shows up in both. Once created, it appears as a card on your Workspace dashboard, which you can open to manage its templates, widgets, snippets, and members.
How to Use It
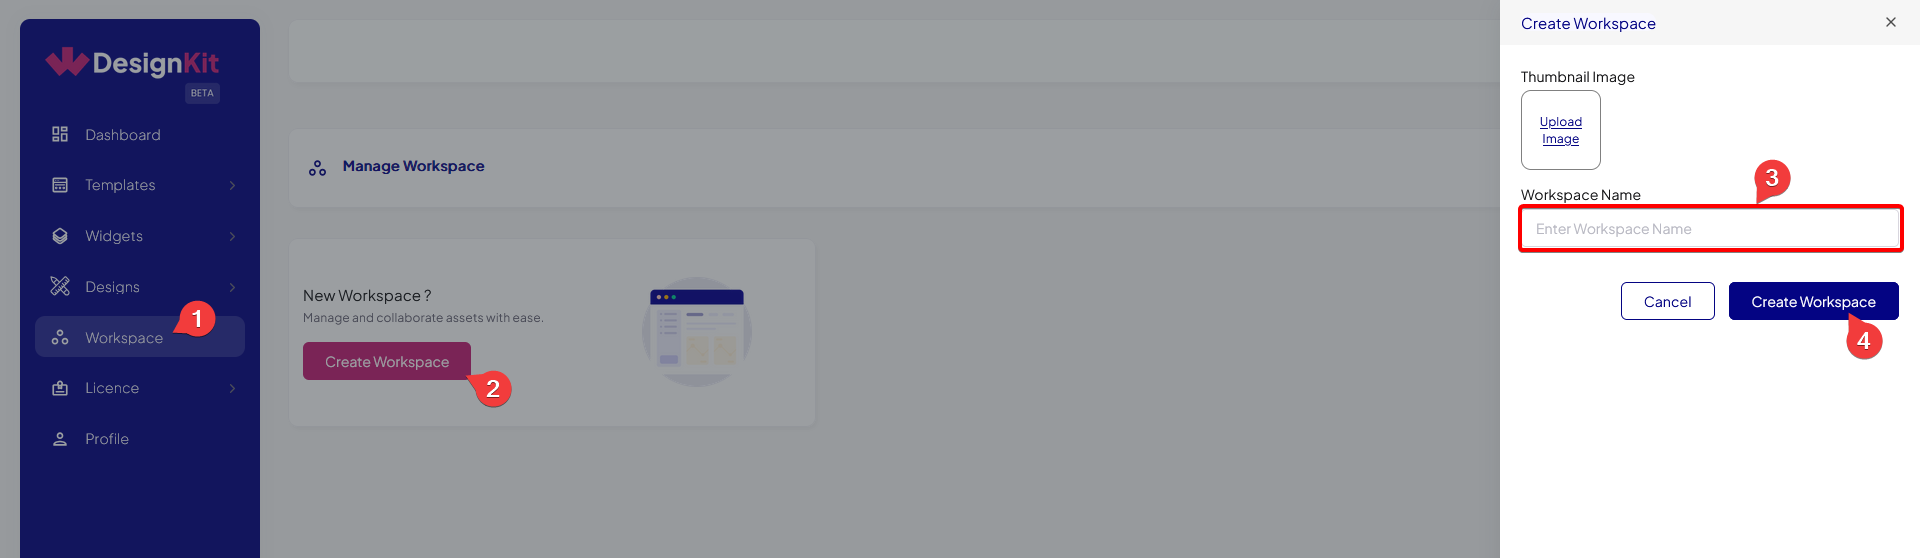
Create Workspace from the WDesignKit App
- Log in to your WDesignKit account in the app.
- Go to Workspace and click Create Workspace.
- In the popup, enter a Workspace Name and, optionally, a Thumbnail Image.
- Click Create Workspace to finish.
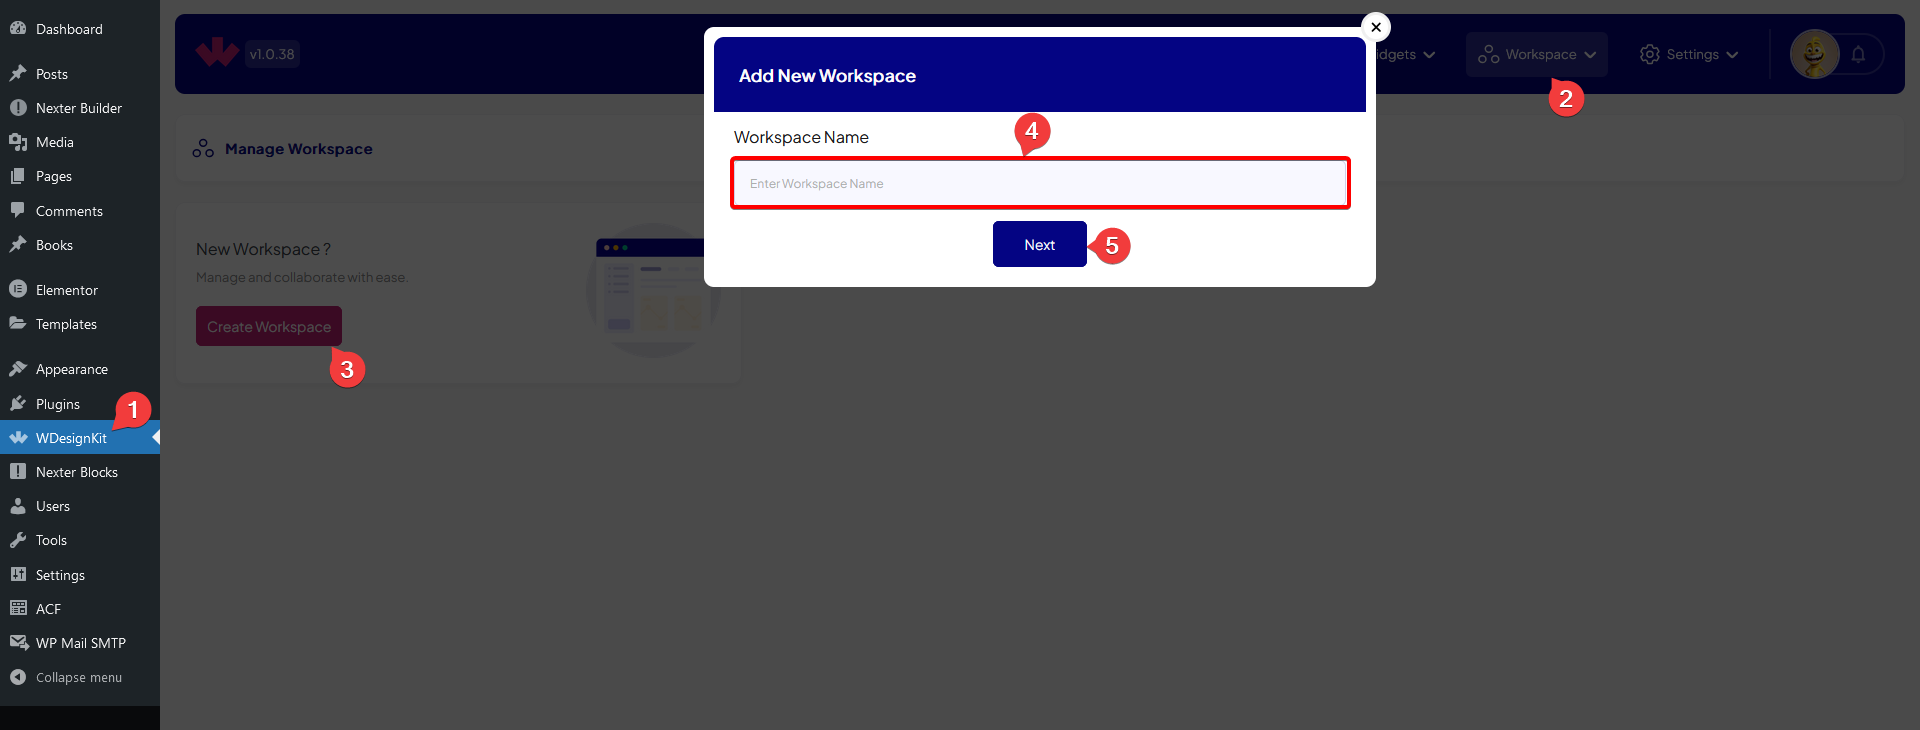
Create Workspace from the WDesignKit Plugin
- Log in to your WDesignKit account inside the plugin.
- Go to Workspace and click Create Workspace.
- In the popup, enter a Workspace Name.
- Click Next to create the workspace.
Use Cases
- An agency creates one workspace per client so each client’s templates and widgets stay separate.
- A freelancer creates a workspace for a specific project and invites the client’s in-house developer as a member to hand off the build.
Limitations
- How many workspaces you can create depends on your WDesignKit plan tier, not on buying extra AI or storage credits. Live-checked on wdesignkit.com/pricing (2026-09-02): Free and Starter each include 1 workspace, Professional includes 4, and Studio and Agency Bundle include unlimited workspaces. This corrects the plan’s older “2 free workspaces, buy credits for more” description, which no longer matches the published pricing page.
- Workspaces are independent containers: content in one is not automatically visible in another, you invite members and share content per-workspace.
Troubleshooting
No FluentSupport ticket specifically about creating a WDesignKit workspace was found for this doc; the items below are derived from the documented workflow itself, not from a support ticket.
- Create Workspace button is missing or greyed out. Confirm you are logged in to a WDesignKit account (workspaces are a cloud feature and are not available while logged out), and confirm your plan still has an available workspace slot for your tier.
- Workspace created in the app does not show up in the plugin, or vice versa. Both surfaces read from the same cloud account, log out and back in on the surface that is missing the workspace to force it to refresh.