
Text Halftone Effects Widget for Elementor
On this page
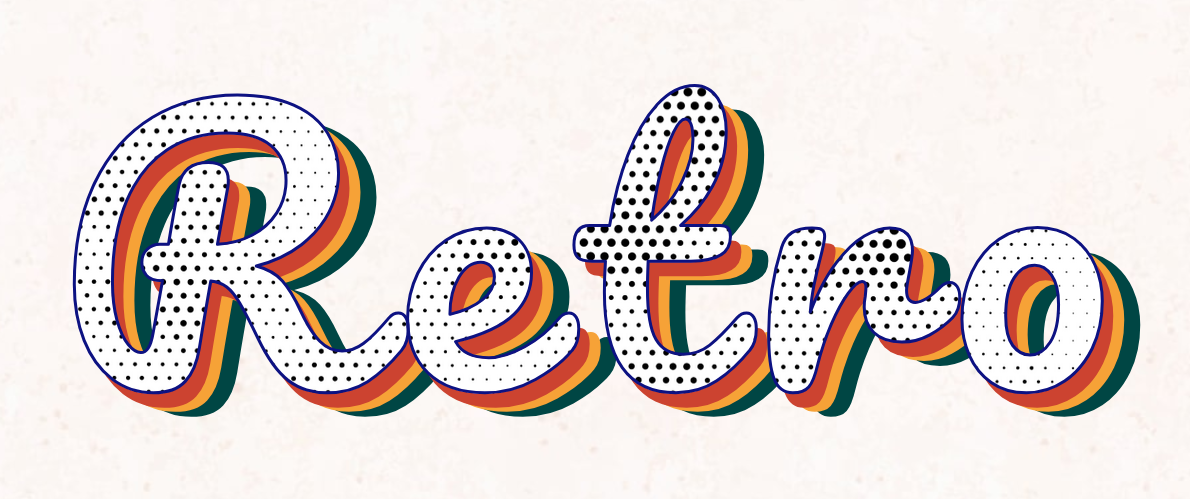
The Text Halftone Effects widget is a pro widget that adds stroke, texture, and layered halftone styling to text.
1. What It Does
Displays a heading whose fill can be swapped for a stroke outline, a repeating texture, or a stack of colored, offset layers behind the main text.
2. Why It Matters
Halftone and layered text treatments give a headline a print or poster-style look that a plain heading cannot achieve on its own.
3. What You Get
A Title field, an optional link, a Stroke toggle, a Texture toggle, and a Layers repeater where each layer has its own fill or gradient color, stroke color and width, and top and left offset.
4. Benefits
Skipped, already covered above: the value is the layered halftone treatment described in Why It Matters and What You Get, restating it here would not add anything new.
5. Capabilities
- Title field for the text
- Url field to link the text
- Stroke toggle to outline the main text
- Texture toggle to fill the main text with a custom texture set on the Style tab
- Layers toggle with a Select Layer repeater, each item with Fill Color, a Gradient Fill Color toggle, Stroke Color, Stroke Width, Top Offset, and Left Offset
6. How It Works
Stroke and Texture change how the main text itself renders, keep Fill Color transparent for the cleanest texture result. Enabling Layers stacks additional copies of the text behind the main one, each positioned by its own Top Offset and Left Offset and colored by its own Fill Color or Gradient Fill Color, which is why Gradient Fill Color hides the plain Fill Color option once turned on. Stroke Color on a layer only shows once that layer’s Stroke Width is set above zero.
7. How to Use It
- Confirm a WDesignKit Pro license is active, this is a pro-only widget.
- Activate the Text Halftone Effects widget from WDesignKit’s Ready Widgets.
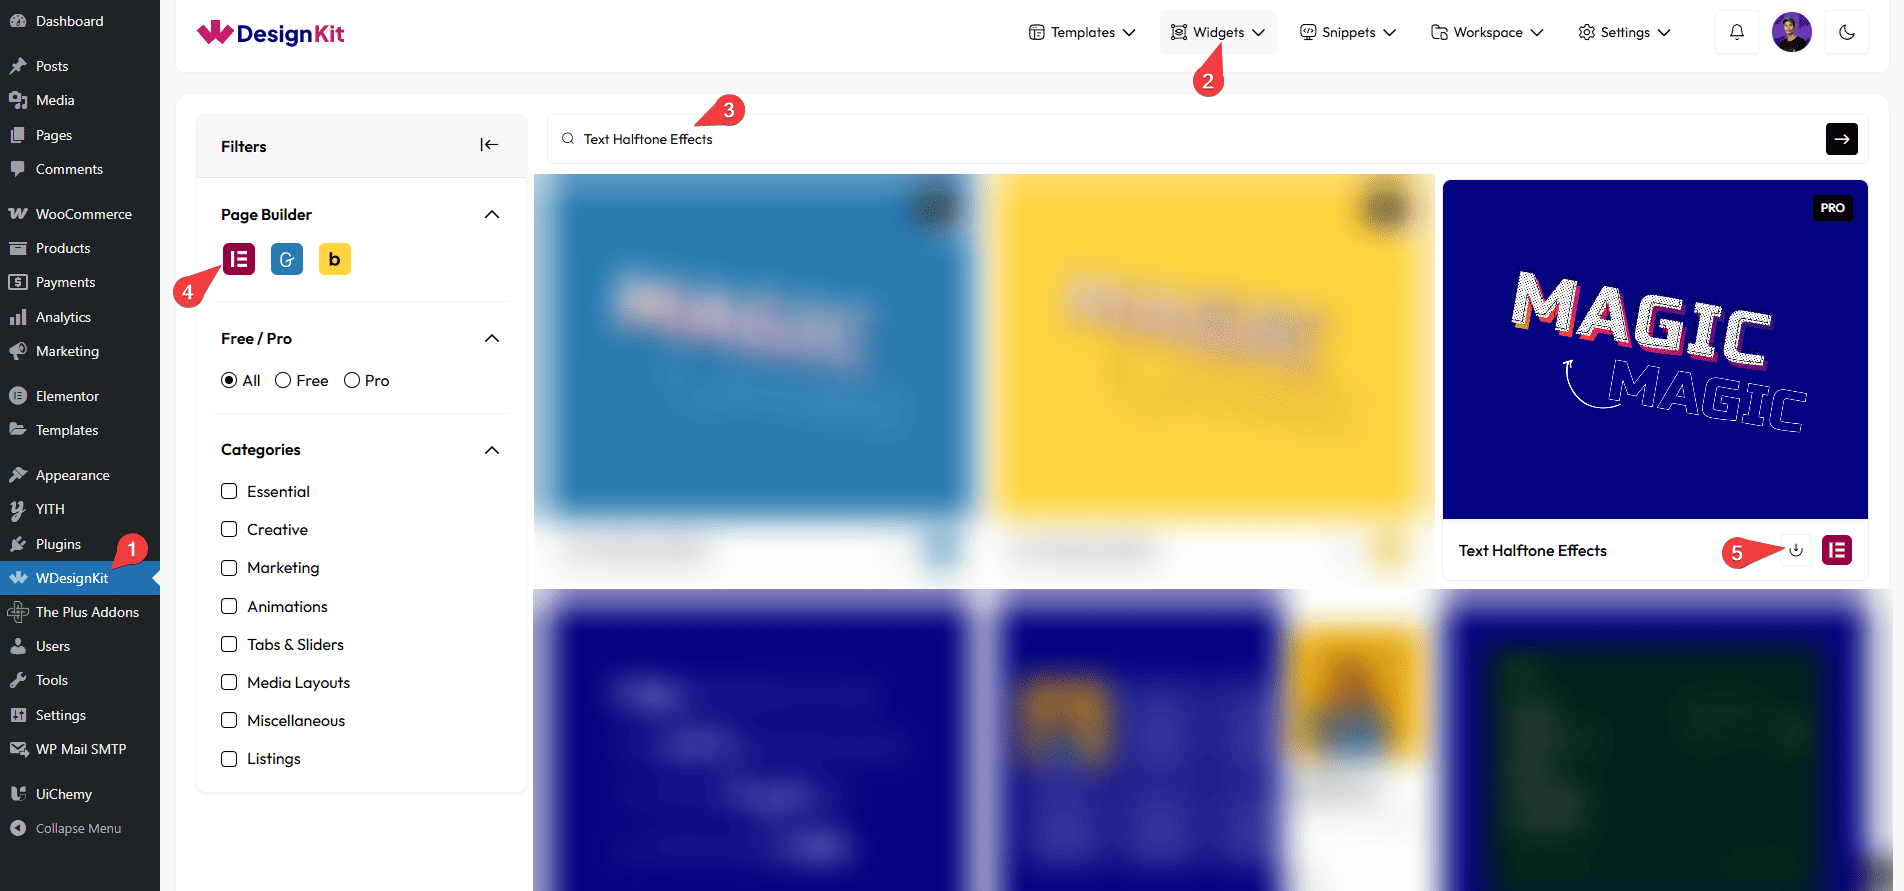
- Drag the widget onto the page, set the Title, and optionally a Url.
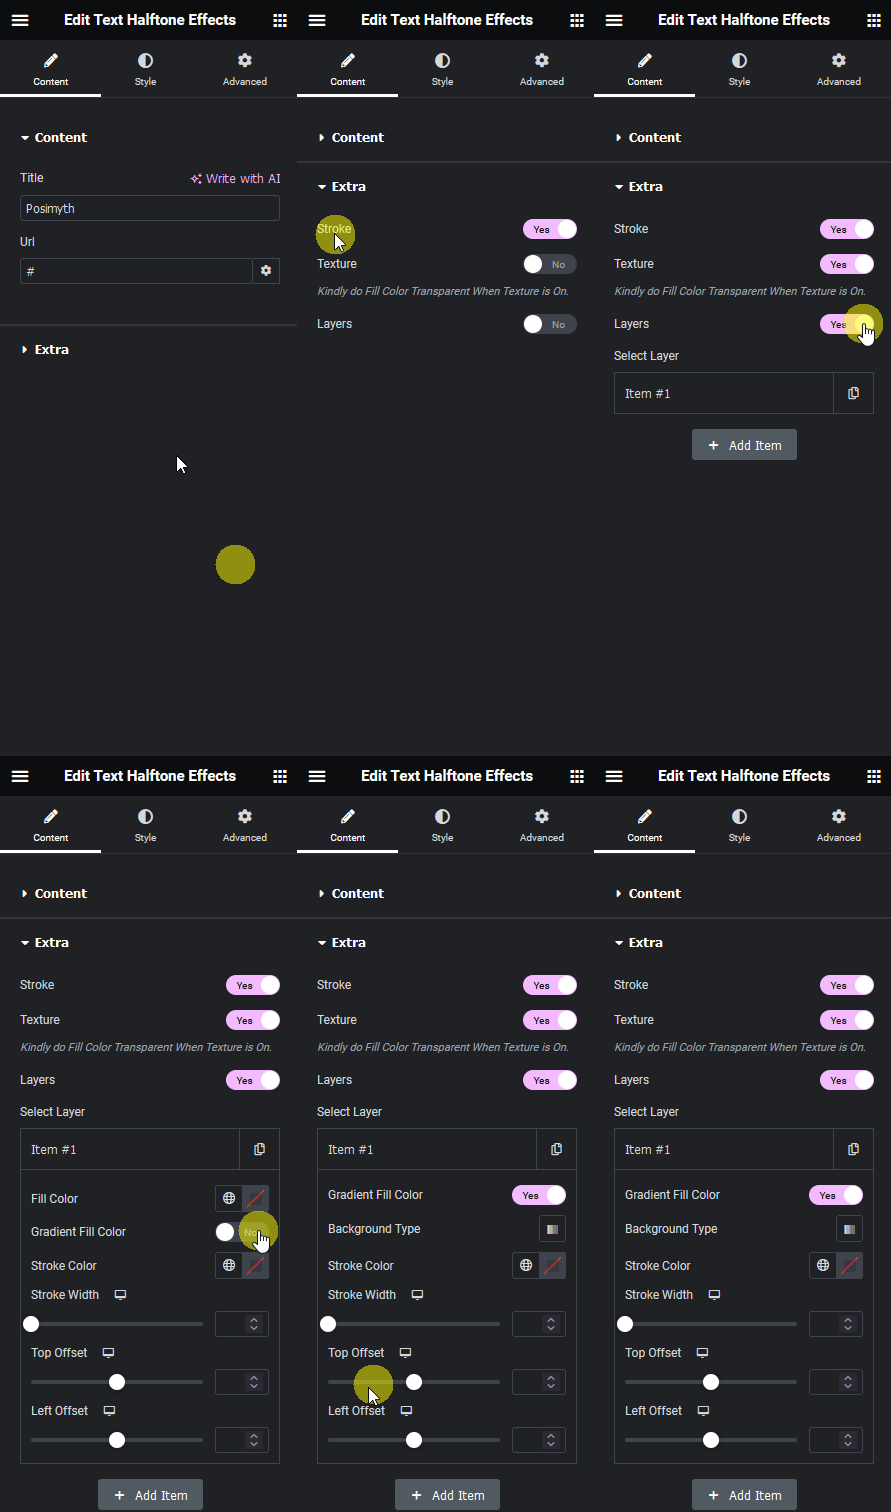
- Enable Stroke or Texture as needed, keeping Fill Color transparent for texture, then add a custom texture on the Style tab.
- Enable Layers, then add and position layers under Select Layer, each with its own colors, stroke, and offsets.
8. Use Cases
- A poster-style hero headline with a textured or layered fill
- A stroke-only heading over a photo background where a solid fill would be hard to read
9. Limitations
- This is a pro-only widget, it does not work without an active WDesignKit Pro license.
- Gradient Fill Color and plain Fill Color cannot be used on the same layer at once, enabling one hides the other.
10. Troubleshooting
- Texture is not visible: confirm Fill Color is set to transparent and a custom texture image is set on the Style tab.
- Layer stroke color does not show: check that Stroke Width for that layer is greater than zero.
- Widget does not appear in the panel after download: confirm the WDesignKit Pro license is active, pro widgets stay hidden without one.