
On this page
- Table of Contents
- Table of Contents
- What a 360 Product Viewer Actually Is
- When a 360 Viewer Is Worth the Effort
- The WDesignKit Product 360 Viewer Widget
- What the live demo does
- What it needs on your site
- Shoot the Image Set Before You Touch the Page
- Shooting checklist
- Mistakes that make a spin look cheap
- Page Speed: Count the Frames
- What to Use When a Spin Is Too Heavy
- Adding the Viewer in Elementor
- Using It on a WooCommerce Product Page
- Limits to Plan Around
- Before You Publish the Page
- Frequently Asked Questions
A product photo that never moves answers one question: what does it look like from the front. A 360 product viewer answers the rest. The shopper drags, the product turns, and the back, the sides and the stitching are on screen without a click.
This guide covers what a 360 viewer needs, when it pays for itself, how to shoot the image set, and how the WDesignKit Product 360 Viewer widget fits into an Elementor page. It also says plainly what we have not tested. We read the live widget page and tried the public demo. We did not import the widget with a Pro licence, so nothing below describes its settings from hands-on use. A post about product pages should not oversell.
Key Takeaways
- WDesignKit lists Product 360 Viewer as a Pro widget for Elementor, and the live page shows version 1.0.1 with JavaScript and CSS assets.
- 360 viewer uses a sequence of still photos, not a video file or 3D model, and the browser swaps one frame for the next as the visitor drags.
- 36 frames at 10 degrees is the sweet spot for most products, while 72 frames at 5 degrees suits jewellery, watches, and detail-heavy items.
- Footwear, bags, electronics, furniture, home goods, jewellery, and watches are strong candidates because buyers want to inspect sides, backs, ports, controls, depth, or small details.
- WDesignKit setup starts with installing the plugin and creating an account, then importing Product 360 Viewer into Elementor and adding the image sequence in the widget settings.
Table of Contents
Table of Contents
What a 360 Product Viewer Actually Is
A 360 viewer is a sequence of still photos taken as the product turns on a platform, played back as the visitor drags. There is no video file and no 3D model. The browser swaps one frame for the next, so the speed of the turn follows the speed of the drag.
That design has two consequences. The quality of the viewer is the quality of the photos, and the weight of the viewer is the combined weight of every frame.
| Approach | What the visitor sees | What you supply | Typical use |
|---|---|---|---|
| Single photo | One angle | One image | Low-risk, low-price items |
| Photo gallery | A handful of fixed angles | 4 to 8 images | Most WooCommerce stores |
| 360 spin | Free rotation by drag | An evenly spaced image sequence | Items where shape and detail decide the sale |
| 3D model | Free rotation and tilt | A 3D asset | Configurable or complex products |
The spin sits between the gallery and a full 3D model. It costs a photography session and no modelling work.
When a 360 Viewer Is Worth the Effort
Adding a viewer to every product page is a poor trade. The shoot takes time, and each spin adds page weight. It earns its place on products where a buyer wants to inspect the object before paying.
Good candidates:
- Footwear, bags and accessories, where the side and back profile matter.
- Electronics and gadgets, where ports and controls sit on different faces.
- Furniture and home goods, where depth and proportions are hard to read from a flat photo.
- Jewellery and watches, where small details drive the decision.
Weak candidates are flat items such as prints, simple apparel on a hanger, and anything sold mainly on a spec sheet. A gallery serves those products as well and loads faster.
A quick way to decide is to read your own support inbox and product reviews. If customers keep asking what the back looks like, whether a port is on the left or the right, or how thick the item is, a spin answers those questions before they are asked. If nobody asks, the extra photography and page weight buy you very little.
The WDesignKit Product 360 Viewer Widget
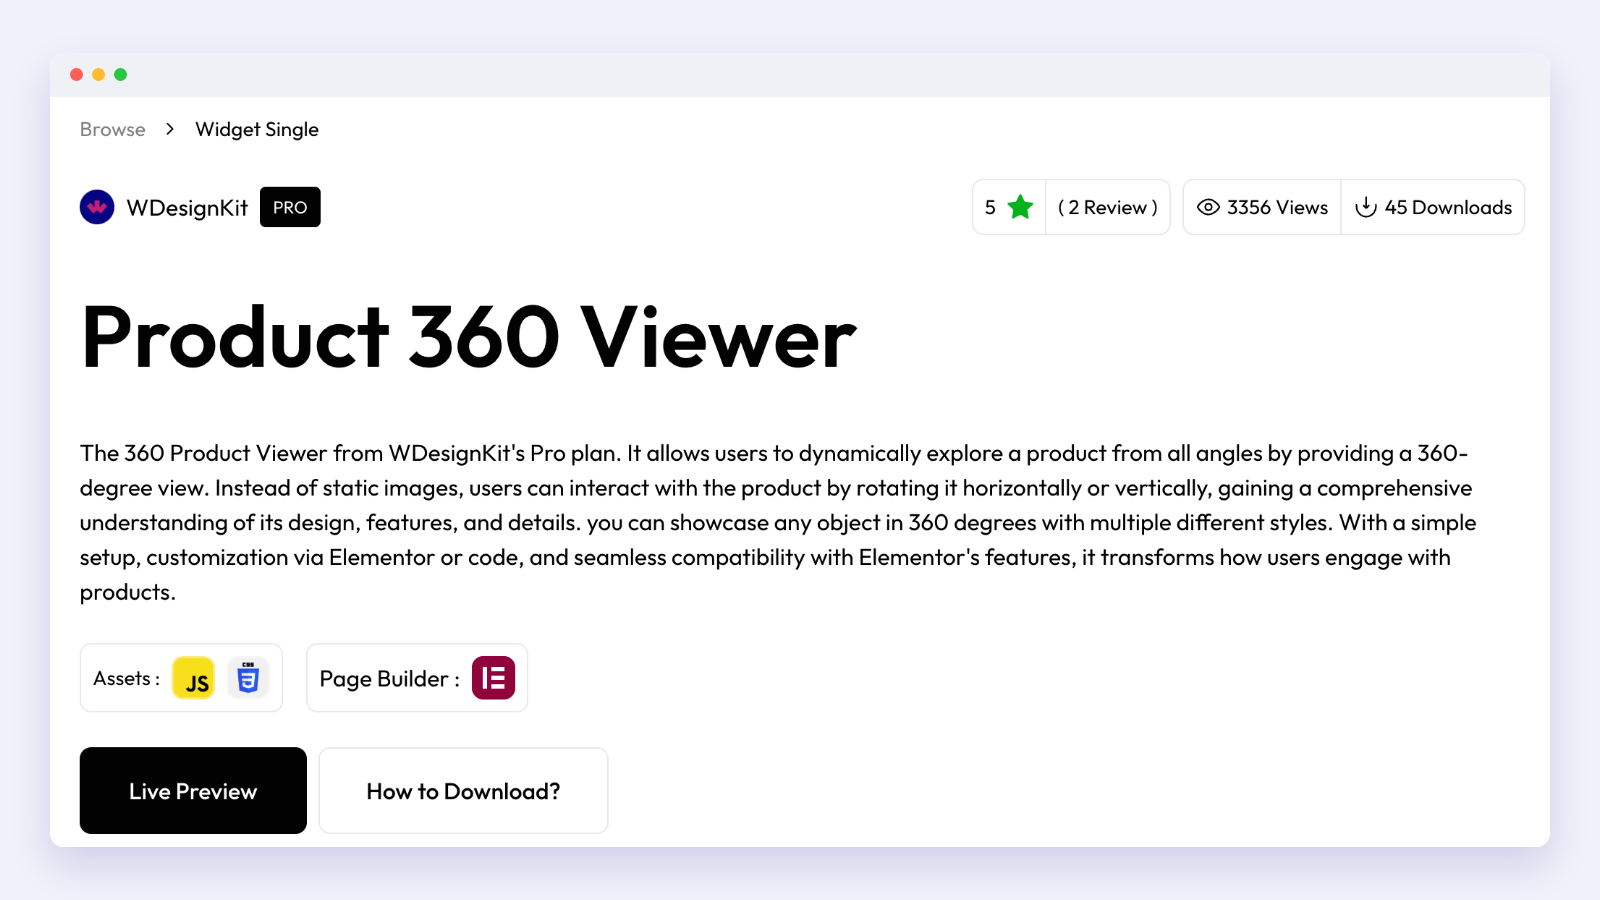
WDesignKit lists a widget called Product 360 Viewer in its widget library. Here is what the live page and the live demo showed on 16 November 2026.
| Item | What we saw |
|---|---|
| Plan | Pro. The page carries the Pro label. |
| Builder | Elementor. The page builder row on the widget page shows the Elementor icon only. |
| Assets | JavaScript and CSS |
| Version | 1.0.1, marked “Last Updated: 1 year ago” |
| Rotation | Horizontal or vertical, by drag |
| Customisation | Through Elementor controls, or HTML, CSS and JavaScript |
| Listed features | Zoom and pan, 360 rotation, cross-browser support, mobile friendly layout |
Read that table with two cautions. The zoom and pan feature comes from the vendor description. We did not see zoom working in the demo, so treat it as listed and unconfirmed. The widget is also a year old, so try it on a staging copy of your site before you build a page around it.
What the live demo does
The demo at etemplates.wdesignkit.com shows five sections: a shopper character called UrbanCart, a watch, a furniture piece, a space-themed section and a VR headset section. On the first one, dragging sideways moved the product from one frame to the next, and the motion kept easing forward after the pointer was released. The page code gives the first viewer an end frame of 10 and switches looping on, so it appears to loop through 10 images. The demo page runs on Elementor 4.3.5, read from the stylesheet version on the live page.
According to the page code, the other demos are set up with different triggers: one turns on the mouse wheel, one follows the mouse pointer, and two play on their own. We confirmed drag-to-rotate by hand. We did not confirm autoplay or wheel control, and we found no fullscreen mode. We found no on-screen buttons or arrows, so the viewer shows only the product.

What it needs on your site
The widget runs through the WDesignKit plugin, so the plugin and an account come first. The WDesignKit plugin on WordPress.org was at version 2.8.2 and tested up to WordPress 7.1.4 when we checked on 16 November 2026. The widget page carries the Pro label and its description calls the viewer part of WDesignKit’s Pro plan, so expect to need a plan that includes Pro widgets. We did not import the widget with a Pro licence, so confirm what a plan includes before you buy. Check the current plans on the WDesignKit pricing page, since prices change around sales.
Shoot the Image Set Before You Touch the Page
The widget plays back whatever frames you give it, so most disappointing 360 viewers start with a weak shoot.
The fixed choice is the frame count. The miops guide to 360 product spins gives a widely repeated convention: 24 frames at 15 degrees per step gives a basic functional spin, 36 frames at 10 degrees is the sweet spot for most products, and 72 frames at 5 degrees is worth it for jewellery, watches and detail-heavy items. That is a vendor guide, so read it as industry convention and not a formal standard.
| Frames | Step | Feel | Suits |
|---|---|---|---|
| 24 | 15 degrees | Functional, slightly jerky | Simple, symmetrical products |
| 36 | 10 degrees | Smooth for most pages | Most store products |
| 72 | 5 degrees | Very smooth | Jewellery, watches, detail-heavy items |
The demo’s first viewer uses 10 images, which shows the widget accepts a small set. A set that short turns in visible jumps, so 10 frames fit a stylised character better than a product you want to sell.
Shooting checklist
- Put the product on a turntable or a marked platform and fix the camera on a tripod. Nothing but the product should move.
- Set the camera to full manual so exposure, white balance and focus stay identical in every frame.
- Mark the rotation steps on the platform edge so each shot lands on the same angle. At 36 frames that is a mark every 10 degrees.
- Trigger the shutter with a remote or a timer, so the camera is never touched between frames.
- Use a plain, evenly lit background and keep the lighting still for the whole rotation.
- Name the files in order, with zero padding: product-01.jpg, product-02.jpg and so on.
- Resize and compress every frame to the size it will show on the page before upload. A frame wider than its display box only adds weight.
Step 7 matters most for speed, and the page speed section below explains why.
Mistakes that make a spin look cheap
Most faults are visible the moment someone drags, and each one has a cause you can fix at the shoot.
| What the visitor sees | Likely cause | Fix |
|---|---|---|
| The product wobbles or drifts sideways | The camera or tripod moved between frames | Lock the tripod and trigger with a remote |
| The turn speeds up and slows down | Uneven rotation steps | Mark each step on the platform edge |
| Brightness flickers while dragging | Auto exposure or changing light | Shoot in full manual under constant light |
| The product swings in a circle | It sits off the platform’s centre | Centre the product on the turntable axis |
| Shadows jump between frames | Hard light or a reflective surface | Use soft, even light on a matte surface |
Shoot one test rotation first and drag through it on a laptop before you commit to the full set. A fault that costs ten seconds to spot costs a whole session to reshoot.
Page Speed: Count the Frames
Every frame is a separate image the browser may need. A 36-frame spin at 200 KB a frame is 7.2 MB, which is a heavy load for a single element on a product page. Treat those figures as planning arithmetic. No measurement of the WDesignKit widget is involved.
Google’s Largest Contentful Paint guidance treats 2.5 seconds or less as a good result, measured at the 75th percentile of page loads. A viewer placed at the top of a product page can become the largest element, so its first frame is the one that counts toward that number.
What helps, in order of effect:
- Where your setup allows it, keep the first visible frame small and let the rest load after the page is interactive. We did not check whether the widget supports this.
- Compress frames to the displayed size, using a modern format your theme and plugins already support.
- Use fewer frames on mobile if your layout lets you swap the image set.
- Place the viewer below the first screen when the page also has a hero image.
We have not measured the widget’s real page weight or its effect on LCP, so this post makes no claim about its load cost.
What to Use When a Spin Is Too Heavy
A 360 spin is one option among several, and some products and pages are better served by something lighter.
- A gallery with a back and a side view. Four to six well-lit fixed angles load faster and cover most buying questions for simple products.
- A short product video. A looping clip of the product turning gives the same overview as a spin, as one file that the visitor cannot drag.
- A 3D model. If the product is configurable, with colours or parts the shopper can change, a spin of photos cannot show every combination and a model can.
- A spin on hero products only. Give the three or four products that earn most of your revenue the full treatment and keep a gallery everywhere else.
Pick per product, not per store. The spin pays back where the extra look changes a purchase, and a gallery is a fair default everywhere else.
Adding the Viewer in Elementor
The setup path described on the widget page is short: install the WDesignKit plugin, create an account, import the widget, then use it in the Elementor editor. The WDesignKit install guide covers the plugin part.
- Install and activate the WDesignKit plugin from WordPress.org, then log in with your account.
- Open the widget library and find Product 360 Viewer, then import it into your site. The widget page marks it Pro, so expect this step to need a plan that includes Pro widgets.
- Open the page or template in Elementor and search the widget panel for the viewer.
- Drag it onto the page and add your image sequence in the widget’s settings.
- Check the result in preview.
- Check the page on a phone and a tablet before publishing.
We did not run steps 2 to 5 with a Pro licence, so this guide does not name the widget’s controls. The demo’s page code hints at drag, mouse wheel, mouse-follow and autoplay modes, but we have not seen the settings that switch between them.
If you want to change how the viewer looks, the widget page says you can use Elementor’s own controls or add HTML, CSS and JavaScript. That route suits teams that already work in code. Readers who prefer templates should look at our guide to the WDesignKit template library, and our comparison of free and Pro plans lists what each plan includes.
Using It on a WooCommerce Product Page
A store owner will want the viewer on the single product template. The widget is built for Elementor, so the natural place for it is an Elementor page or template. A product template built with Elementor Pro’s WooCommerce Builder is the obvious target, and we have not tested it there.
Two things are unverified and we will not guess:
- Whether the widget can read a WooCommerce product gallery or a custom field, so the image set follows each product automatically.
- Whether it behaves correctly inside a product template on the current WooCommerce release.
We have not run that test, so treat both as open questions.
Plan for the cautious case: one widget per product page, with the image set added by hand. For a few hero products that is workable. For a catalogue of hundreds it is not, and a gallery is the better default there. Our guide to Elementor WooCommerce templates explains where WDesignKit helps a store build and where it does not.
Limits to Plan Around
- Labelled Pro. The widget page marks it Pro, so a free-plan site should not expect to use it. We did not test an import on any plan.
- Elementor only. The widget page lists Elementor as its page builder. Gutenberg and Bricks sites need another route.
- Age. Version 1.0.1 was last updated about a year before this check. Test it on a staging copy of your site first.
- Weight. Frame count and frame size set the load cost, and you control both.
- Unconfirmed controls. Zoom is in the vendor description, and autoplay, wheel and mouse-follow modes are in the demo’s page code. We saw only drag-to-rotate work.
Before You Publish the Page
- The image set has a consistent angle step, the same lighting and an ordered file name.
- Every frame is resized to its display size and compressed.
- The viewer’s first frame is a sensible product photo, in case a visitor never drags.
- The page is checked on mobile, because touch drag is the main input there.
- Largest Contentful Paint is measured on the live page, with the viewer in place.
- A normal photo gallery is still reachable for anyone who cannot or will not use drag.
If you have a product you want to test this on, the WDesignKit Facebook group is the place to share results and ask questions. The best free Elementor templates roundup helps if you are still choosing the base design for the store.
Frequently Asked Questions
Why does a 360 product viewer look choppy with only a few frames?
A 360 product viewer is only as smooth as the image sequence behind it. The page shows that 10 frames create visible jumps, while 24 frames at 15 degrees is functional, 36 frames at 10 degrees is the sweet spot for most products, and 72 frames at 5 degrees is better for jewellery and watches. If the spin feels cheap, the usual fix is more evenly spaced frames, not more effects.
What kinds of products are worth using a 360 product viewer on?
The best candidates are products where shape drives the sale. The page calls out footwear, bags, accessories, electronics, furniture, home goods, jewellery, and watches. Those categories benefit because buyers want to inspect sides, backs, ports, controls, depth, or small details before they commit. Flat items like prints or simple apparel usually do better with a gallery because they do not need that extra inspection.
Does the WDesignKit Product 360 Viewer work on non-Elementor sites?
The widget page lists Elementor as its page builder, so it is aimed at Elementor pages and templates rather than Gutenberg or Bricks sites. WDesignKit Learning Center also notes that the widget is Pro and that it runs through the WDesignKit plugin. For a WordPress site built around Elementor, that makes it a natural fit; for other builders, this page does not show a supported path.
How do I know if my 360 spin will hurt page speed?
Frame count is the main thing to watch because every frame is another image the browser may need. The page gives a simple example: 36 frames at 200 KB each adds up to 7.2 MB for one element. That matters because Google treats Largest Contentful Paint at 2.5 seconds or less as good at the 75th percentile. Smaller first frames and compressed images reduce the risk.
What should I use instead of a 360 spin when the image set is too heavy?
A lighter option is usually better when speed matters more than rotation. The page suggests four to six fixed gallery images with back and side views, a short looping product video, or a full 3D model if the product has configurable parts or colors. It also recommends reserving spins for hero products only, which keeps the extra photography focused where it can change a purchase.
How do I add the Product 360 Viewer in Elementor without breaking my product page?
The safest path is to install and activate the WDesignKit plugin first, then import Product 360 Viewer into Elementor and test it on staging before publishing. WDesignKit Learning Center says the widget is Pro and that its age makes staging important because version 1.0.1 was last updated about a year before the check. That matters on product pages because you want to catch layout or control issues before customers see them.
Last reviewed: November 17, 2026
Author

Sagar is the Founder & CEO of POSIMYTH Innovations, with 10+ years building WordPress products trusted by 100,000+ websites globally. He has led the development of The Plus Addons for Elementor, Nexter, WDesignKit, and UiChemy, all built hands-on from concept to launch. His work focuses on making website building faster, more flexible, and accessible for creators and businesses worldwide.
Share this article